Course – Payments
In Mentortools, you can easily set up and manage payments for your courses. In this guide, you will learn how to set up payments for your online courses.
Last updated 10 months ago
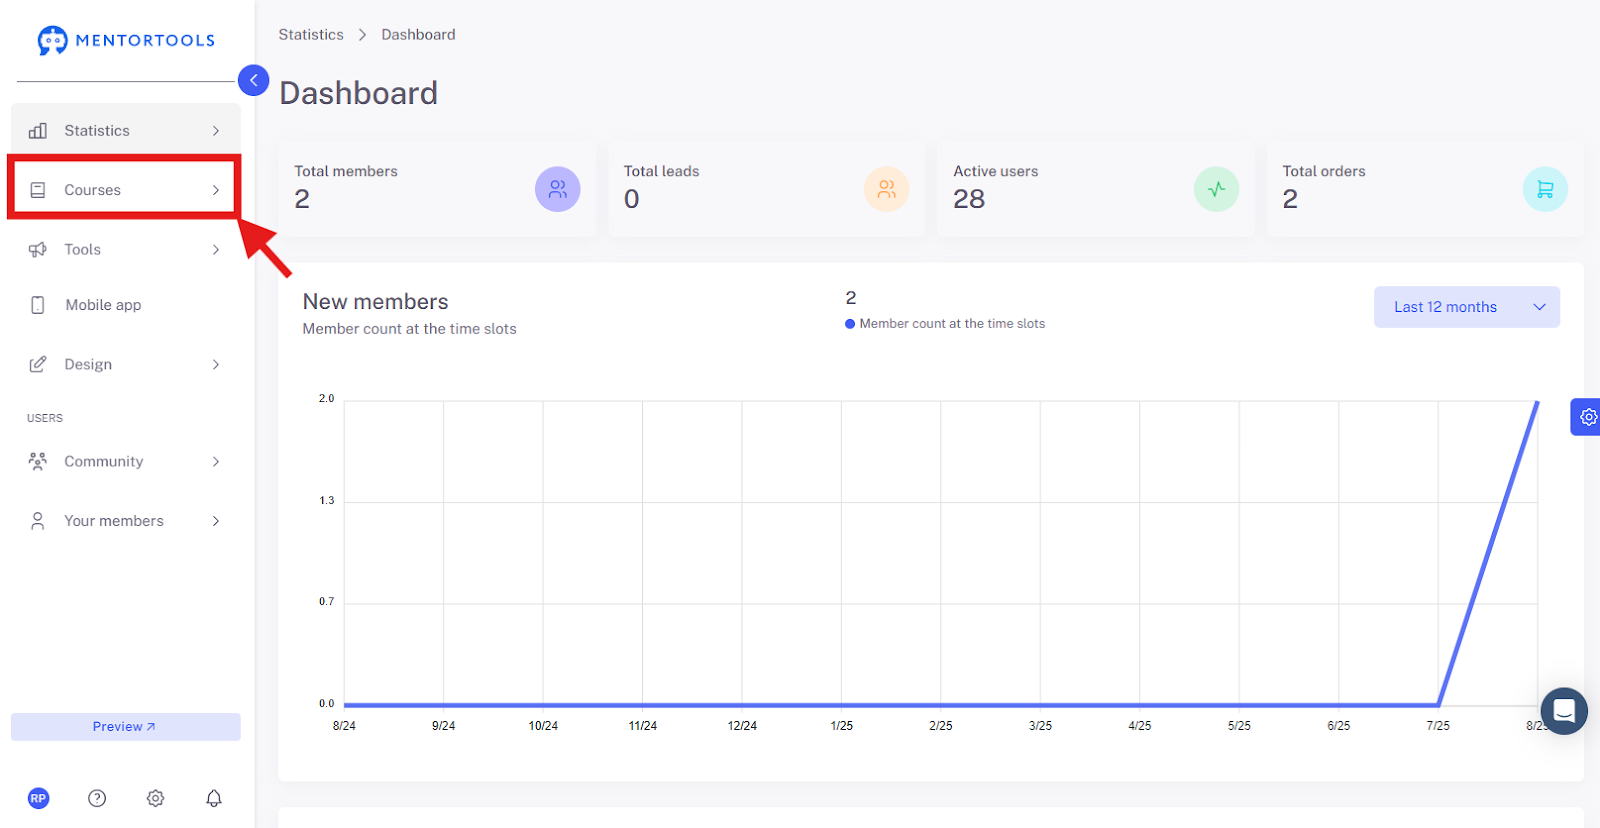
1. Click on "Courses"
In your online academy, go to "Courses" in the side panel.
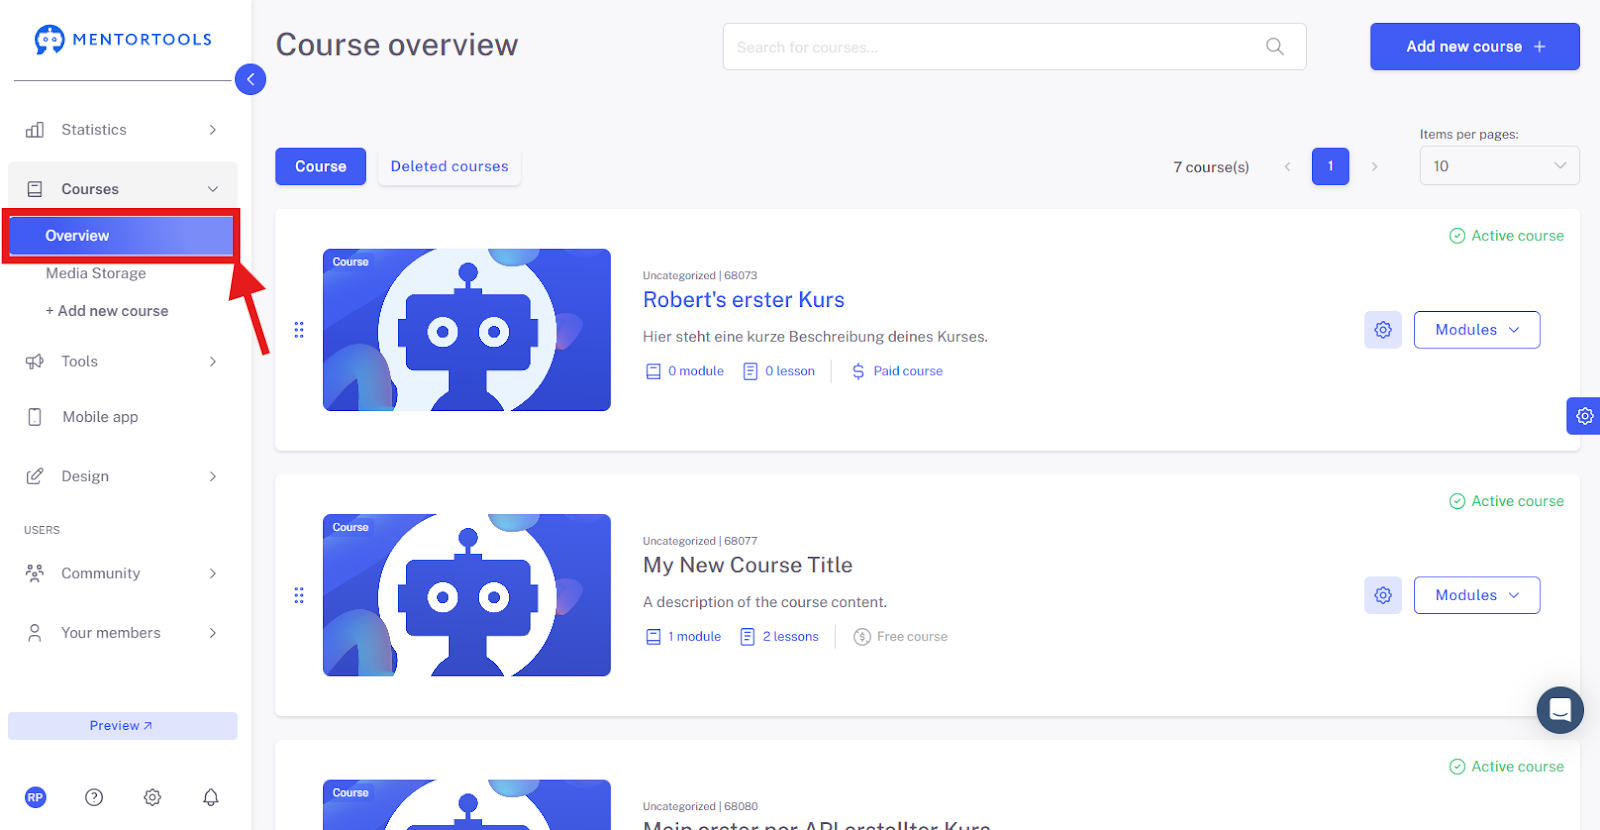
2. Go to "Overview"
To display the list of all your courses, then go to "Overview".
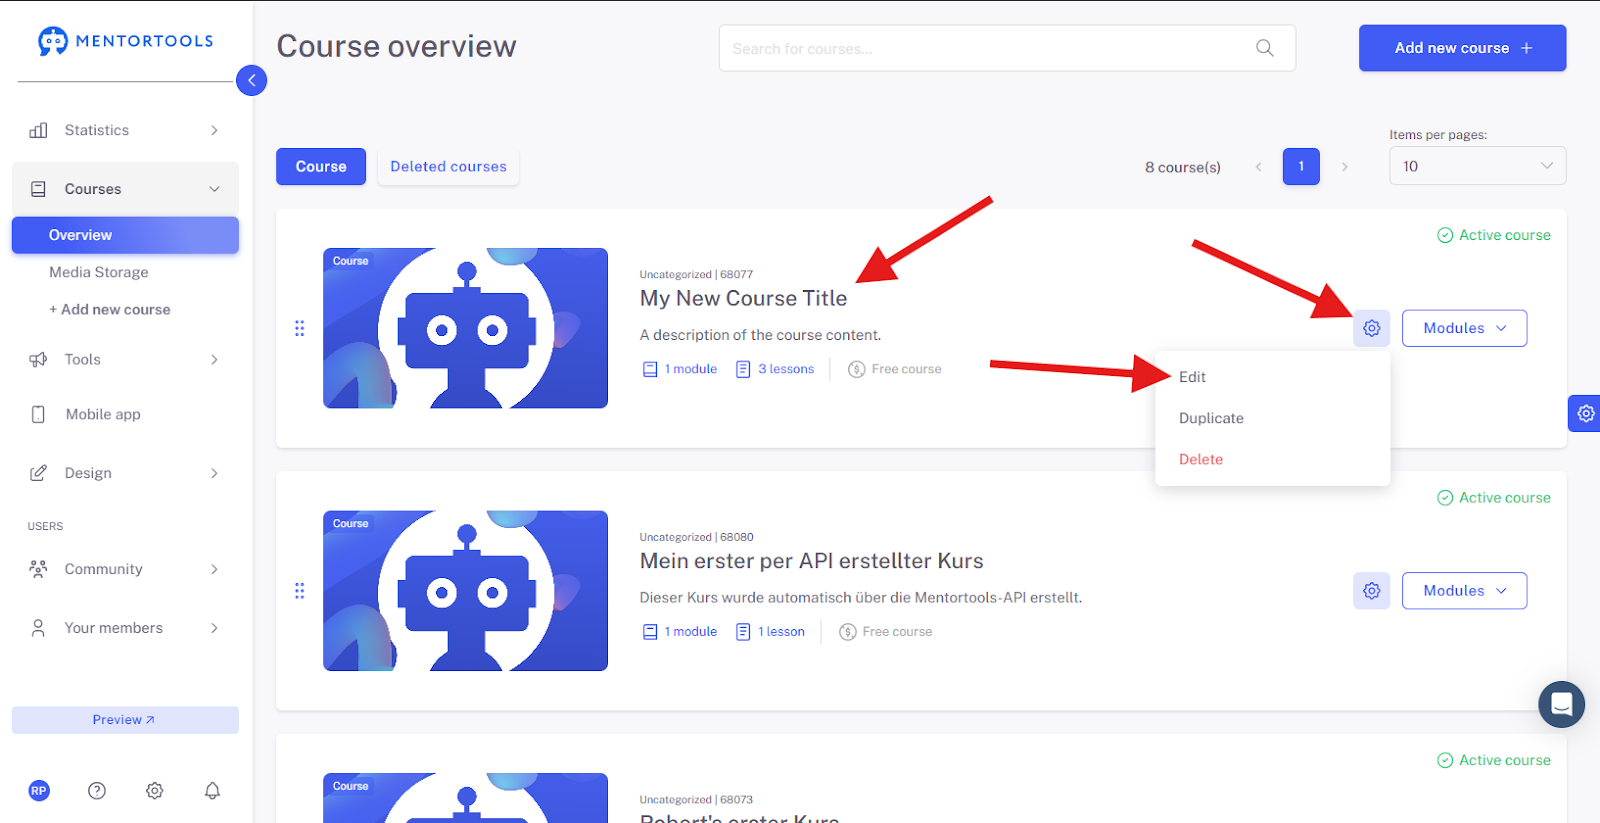
3. Select a Specific Course
To view the settings for a specific course, click on the title of one of the courses in your list. (Or click on the gear icon next to the course title and then select the "Edit" option.)
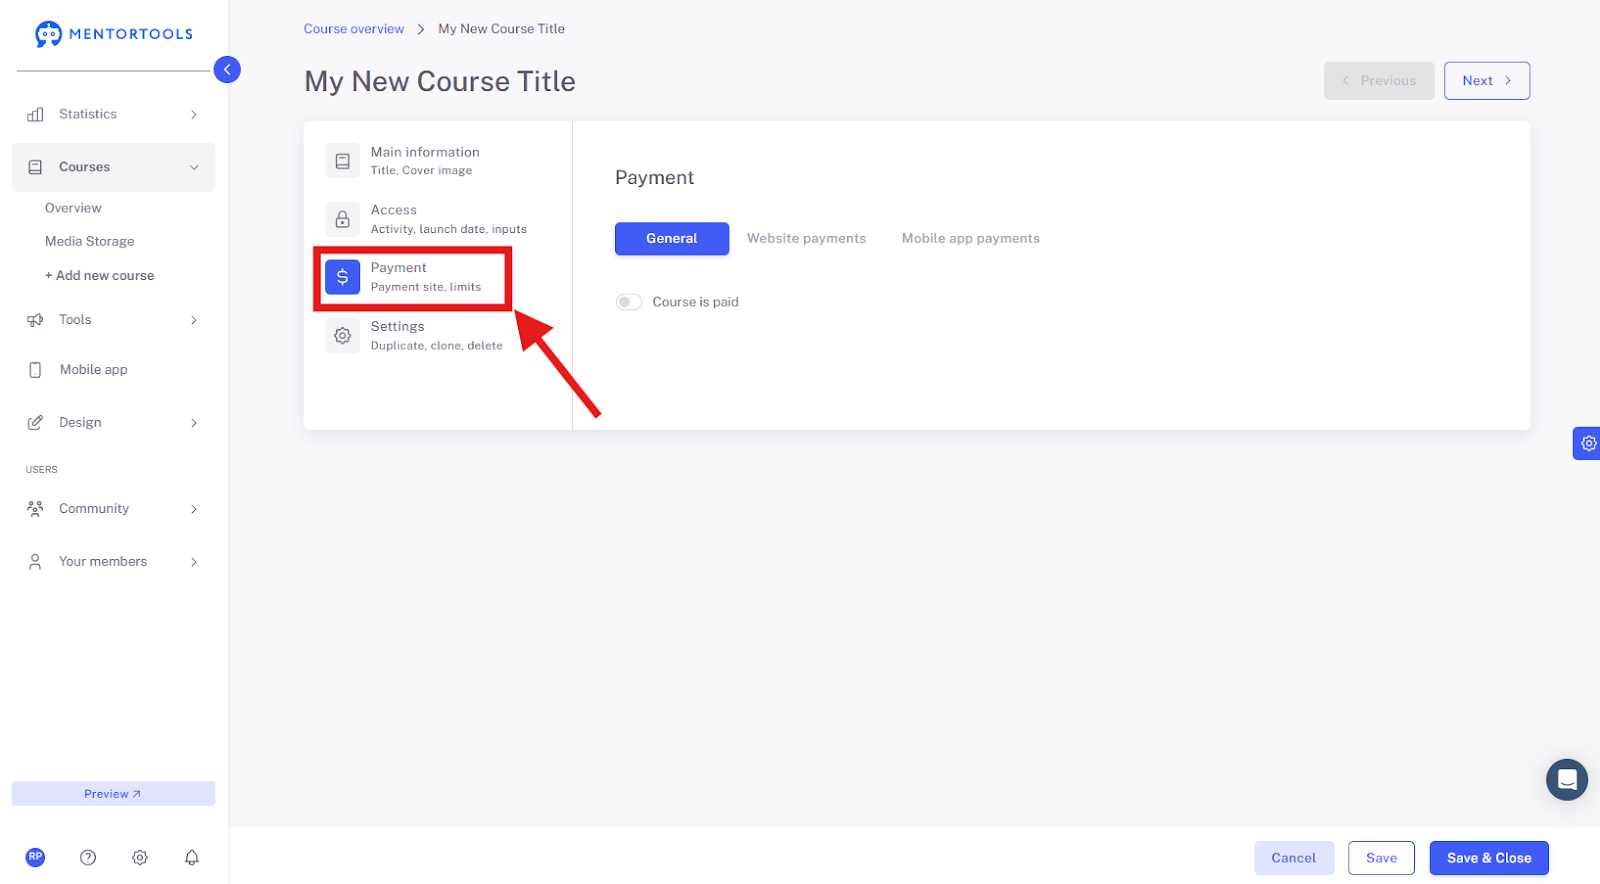
4. Payment Settings
The individual settings for this online course will then be displayed. Next, the settings for "Payment" are shown.
5. General Settings
In the general settings, you can determine whether your course is free or paid. If you want the course to be free, leave the switch deactivated. All users of your membership area will then have access to the active free courses available in your online academy.
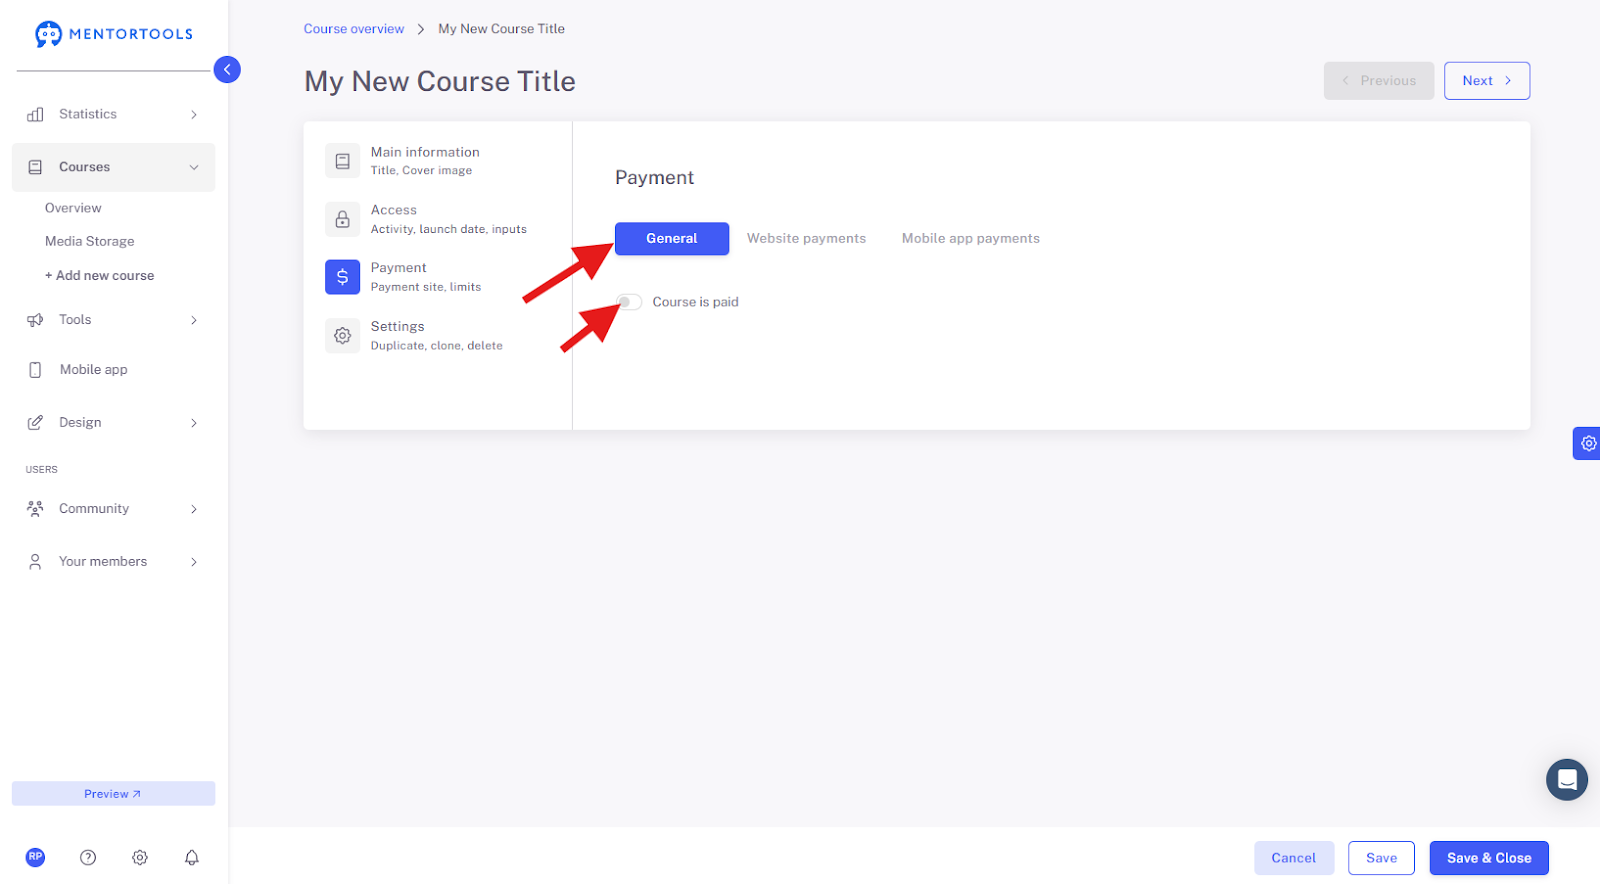
Switch deactivated = It's a free course.
If you want the course to be paid, activate the switch—the course will be set as paid. Then go to the "Website Payments" tab ("Payments in the mobile app") to set up the payment provider.

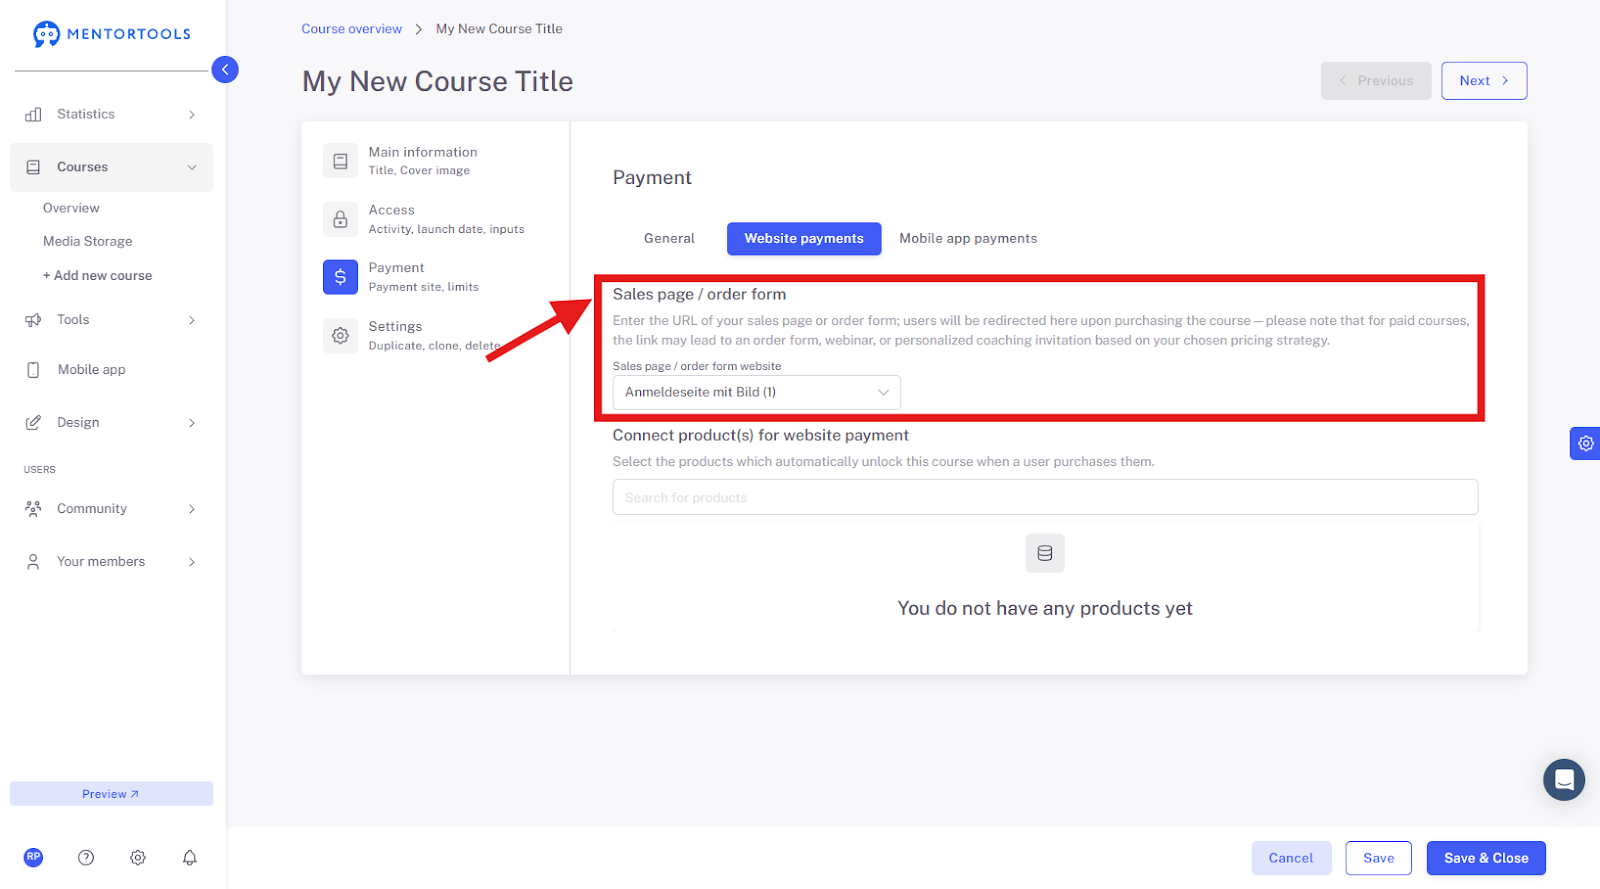
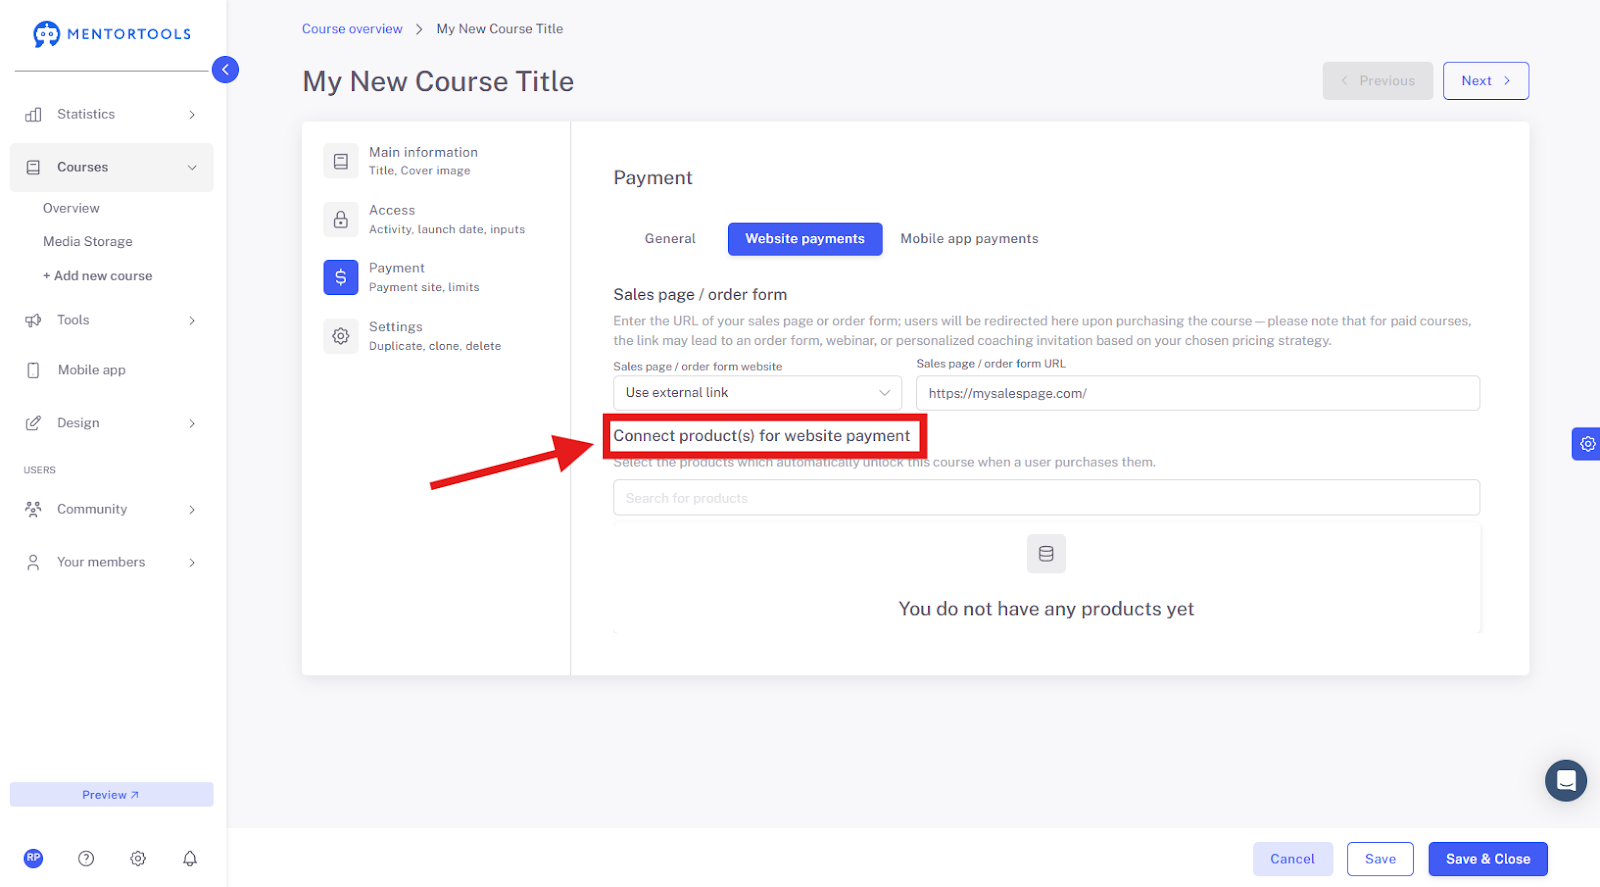
6. Go to "Website Payments"
If you set your course as paid in the previous step, you will connect the course to the payment provider in this section.

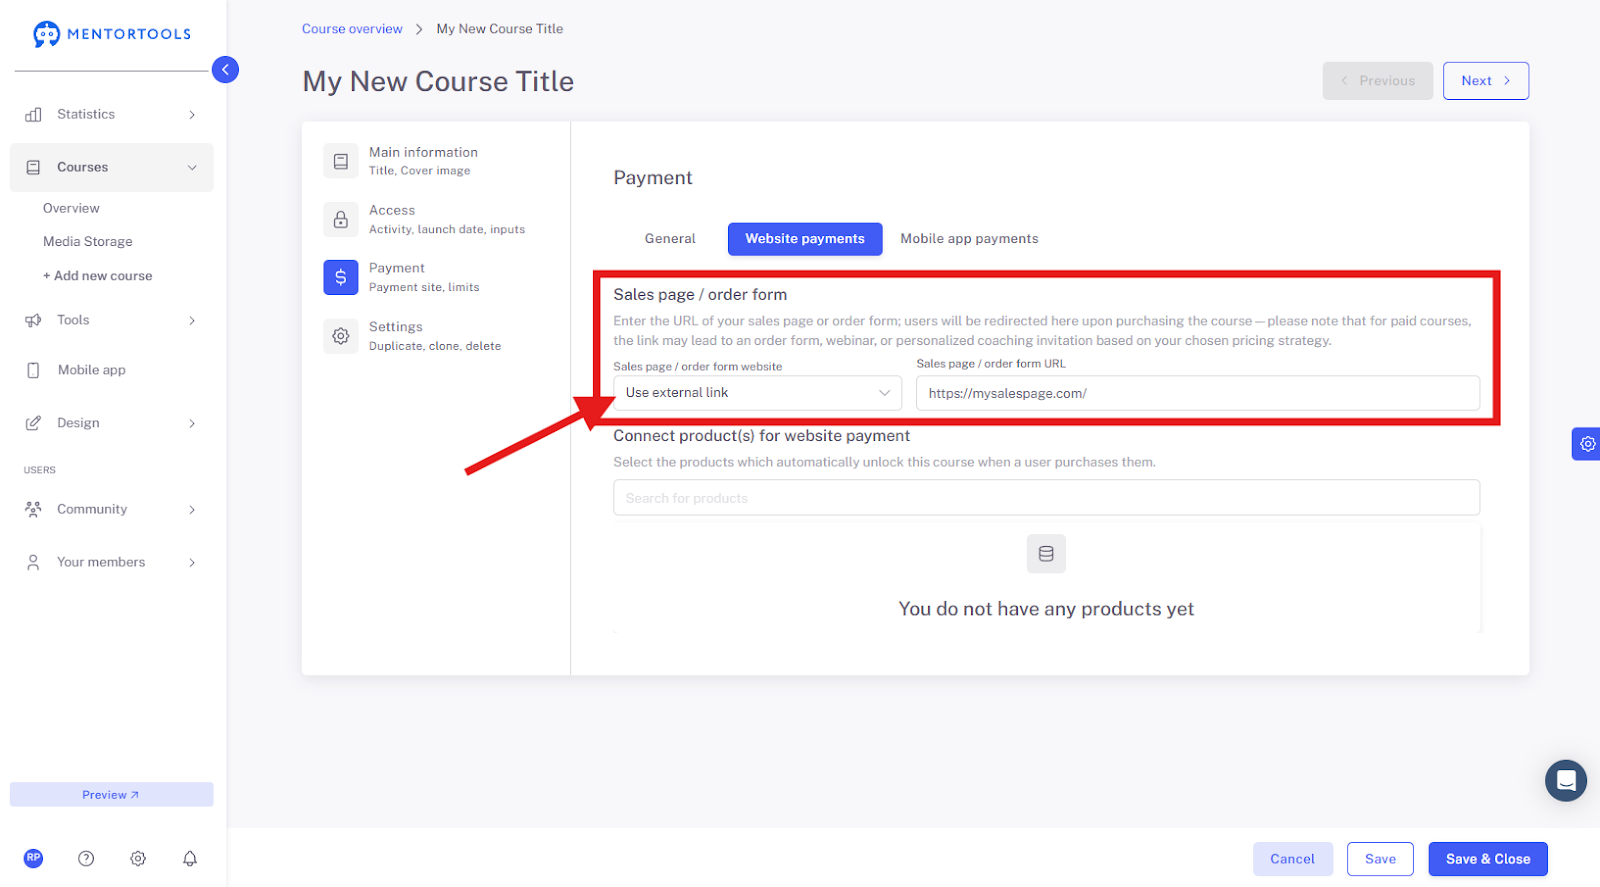
7. Setting up the Sales Page/Order Form
If you set your course as paid, you must also set up a sales page/order form for this course. Here you can either insert an external link to a promo page, for example, from your website. You can also use a sales landing page created directly in Mentortools, or you can directly insert the link to the order form. This page/form will be displayed to the customer in the course list when they click on the "More Info" button under the respective course.
If you want to use a page from Mentortools, simply select the page from the list of pages.

If you want to insert an external link, select the "Use external link" option and insert the corresponding link into the empty field.
8. Connection to the Payment Provider
In the last step, connect your course to the corresponding product of the payment provider. After you have connected your Mentortools account to the payment provider (under Settings → Payment Provider), you will see a list of the products you can connect at the bottom. Select the appropriate product from the payment provider here.
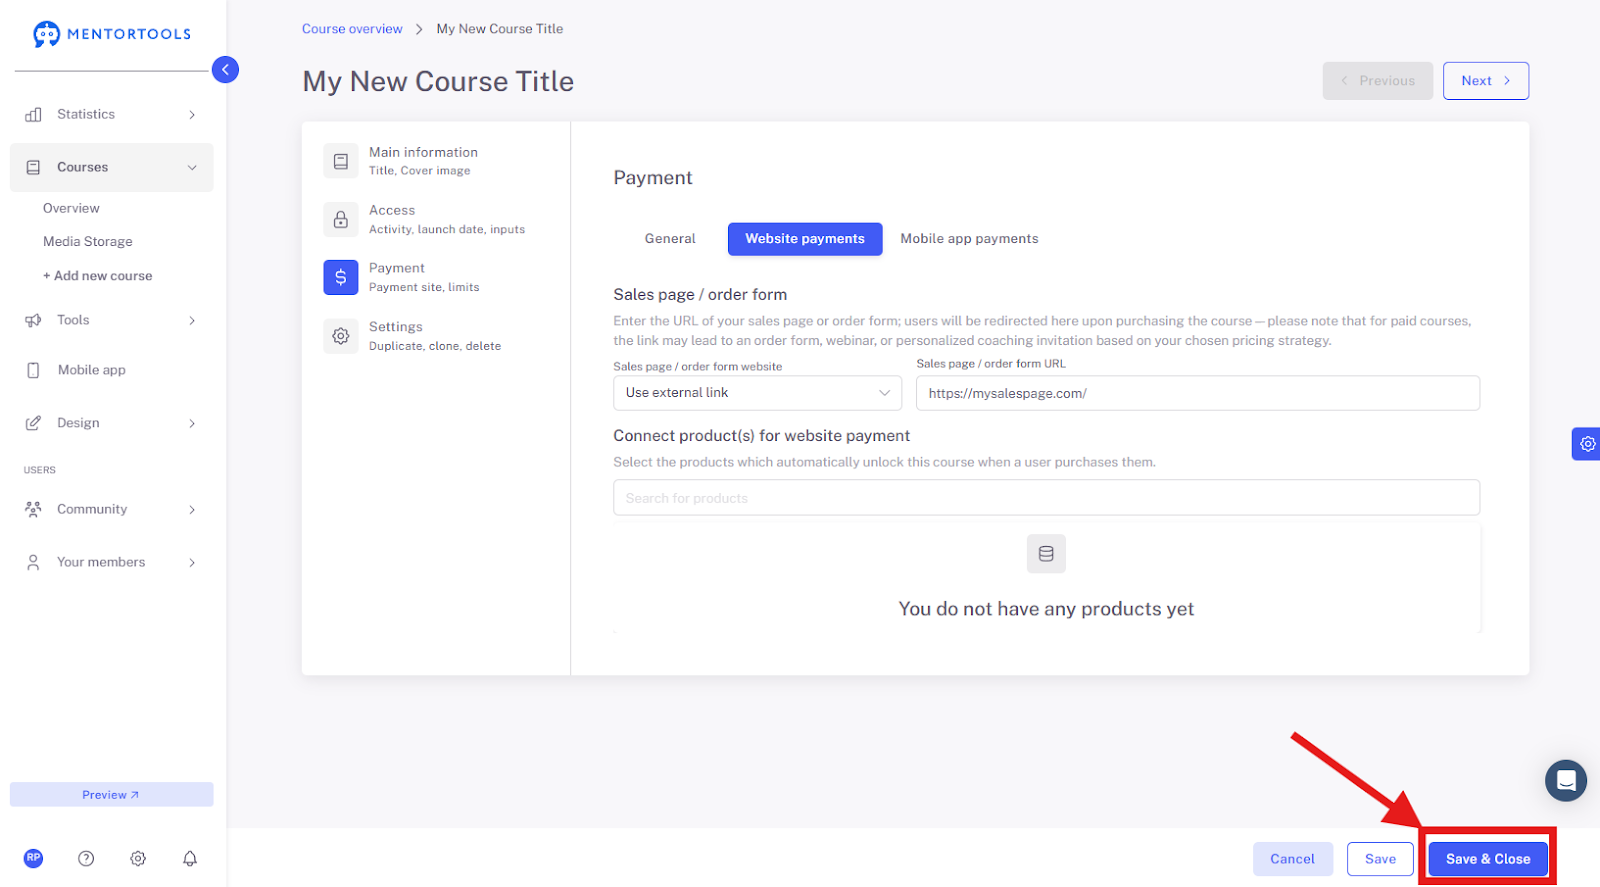
9. Save and Close
After you have set all the necessary information for your course, don't forget to save these changes by clicking on the "Save" or "Save and close" button in the bottom right corner.
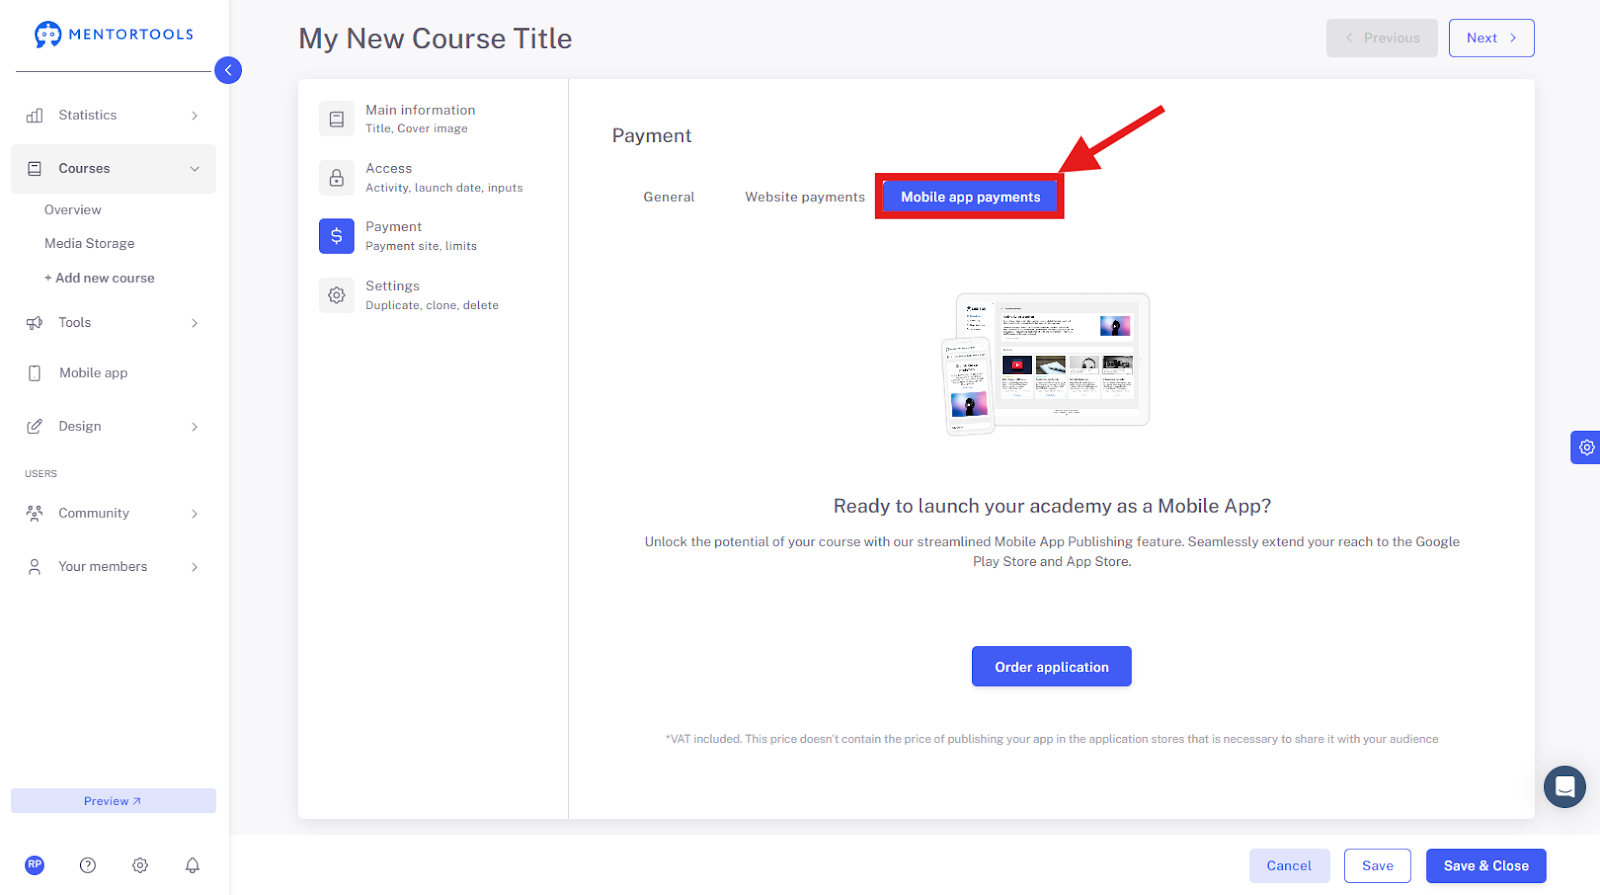
10. Payments via Mobile App
If you have also set up a mobile app for your online academy, you can connect your online course with the products of the payment providers for mobile apps in the "Payments via mobile app" section.