How to Connect Shopify with Mentortools (Make)?
Last updated 9 months ago
You can use the following guide to grant access to your courses based on sales through Shopify. You will need:
A Mentortools course you want to sell.
A Shopify store with a subdomain.
A Make account.
1. Create a New Scenario for the Connection Between Shopify & Mentortools
Open the following link for the Make platform and click on “Create scenario”.https://eu2.make.com/2706588/team/dashboard

2. Select Shopify as the Trigger
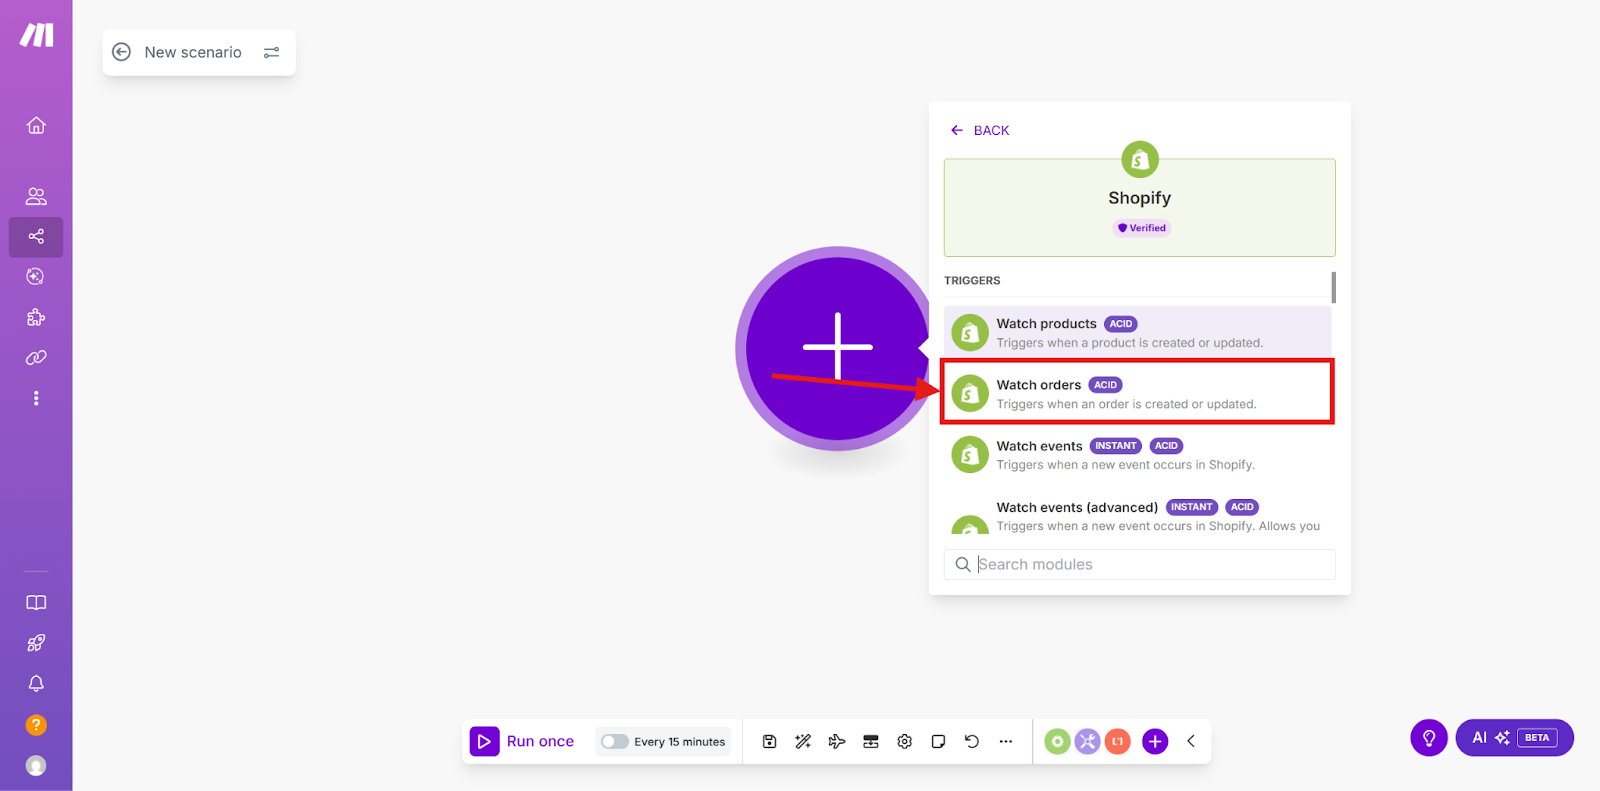
In the Make Editor, you will be prompted to set up the first step, the workflow's Trigger. Enter Shopify into the search field and select Shopify as the App.

Now choose the appropriate “Trigger.” In this example, we use “Watch orders”.
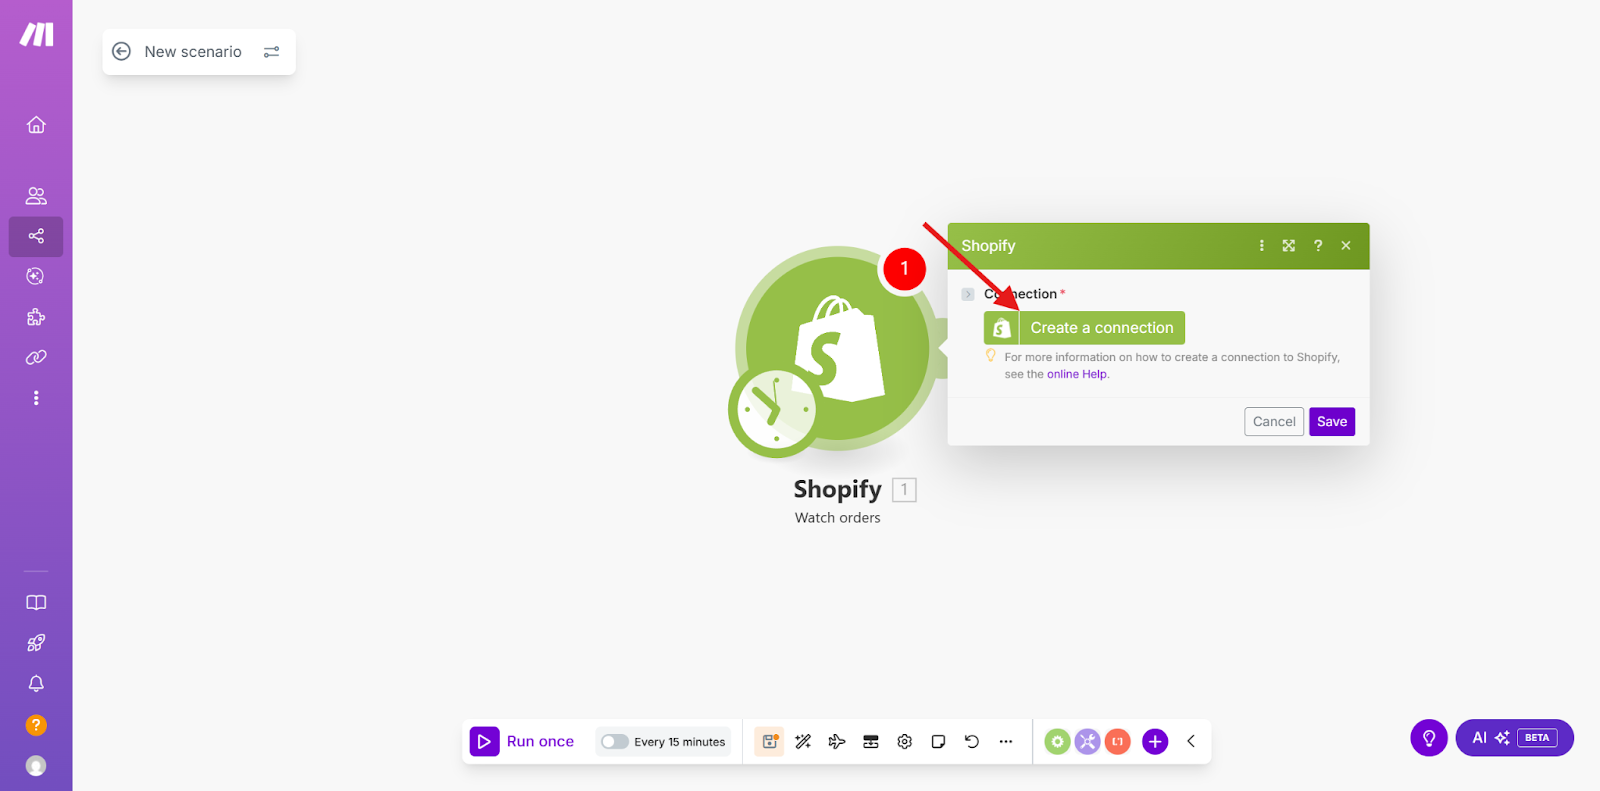
Now go to “Create a connection” to set up the connection between Make and Shopify.
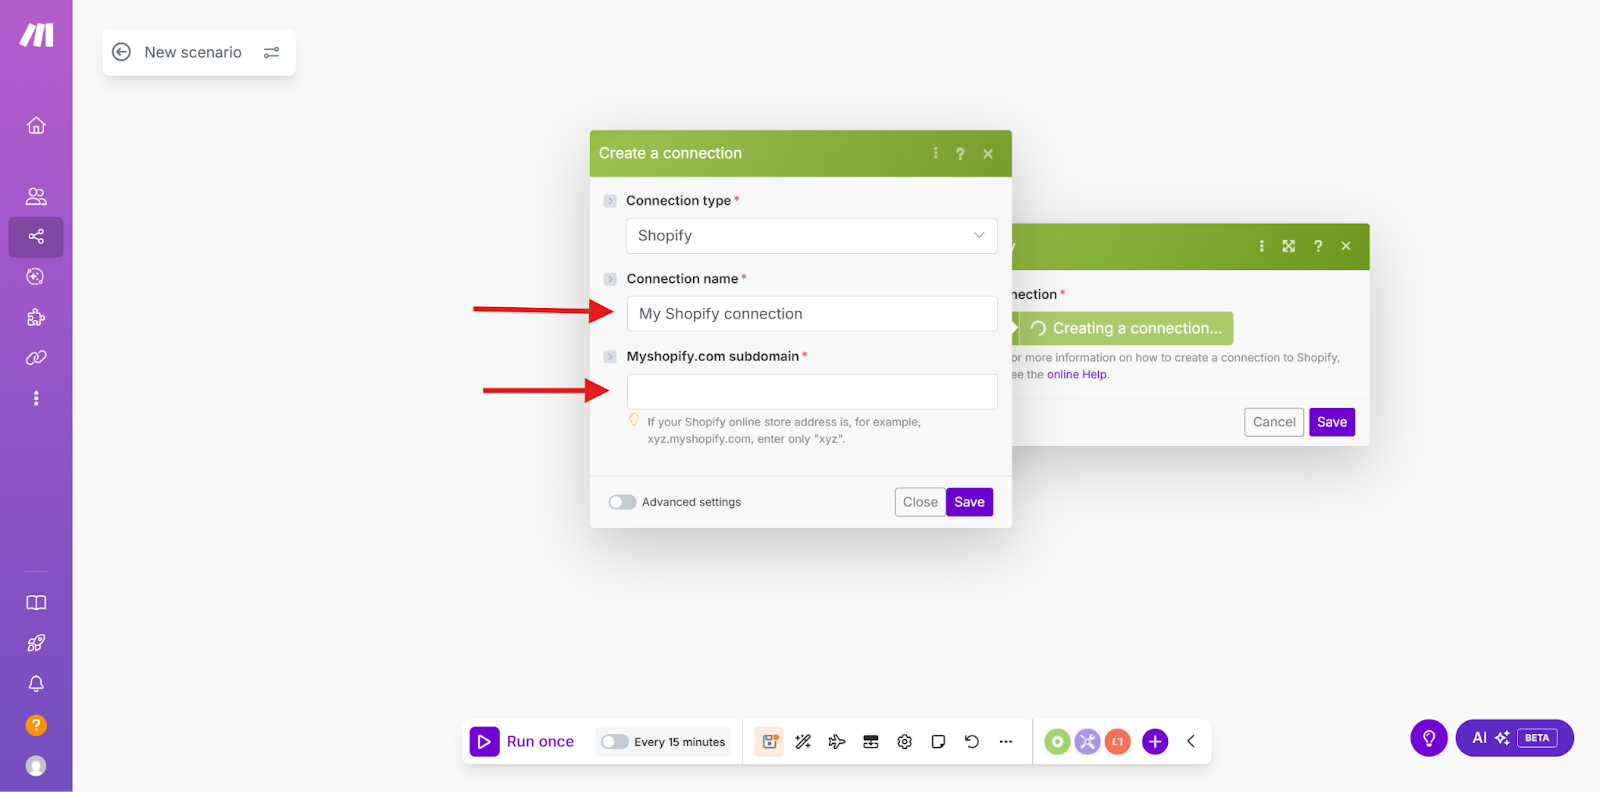
In the next step, “Connection type,” select “Shopify.”

Now give the connection a name and enter your Shopify subdomain.
You can find your subdomain in your Shopify account under “Domains.”
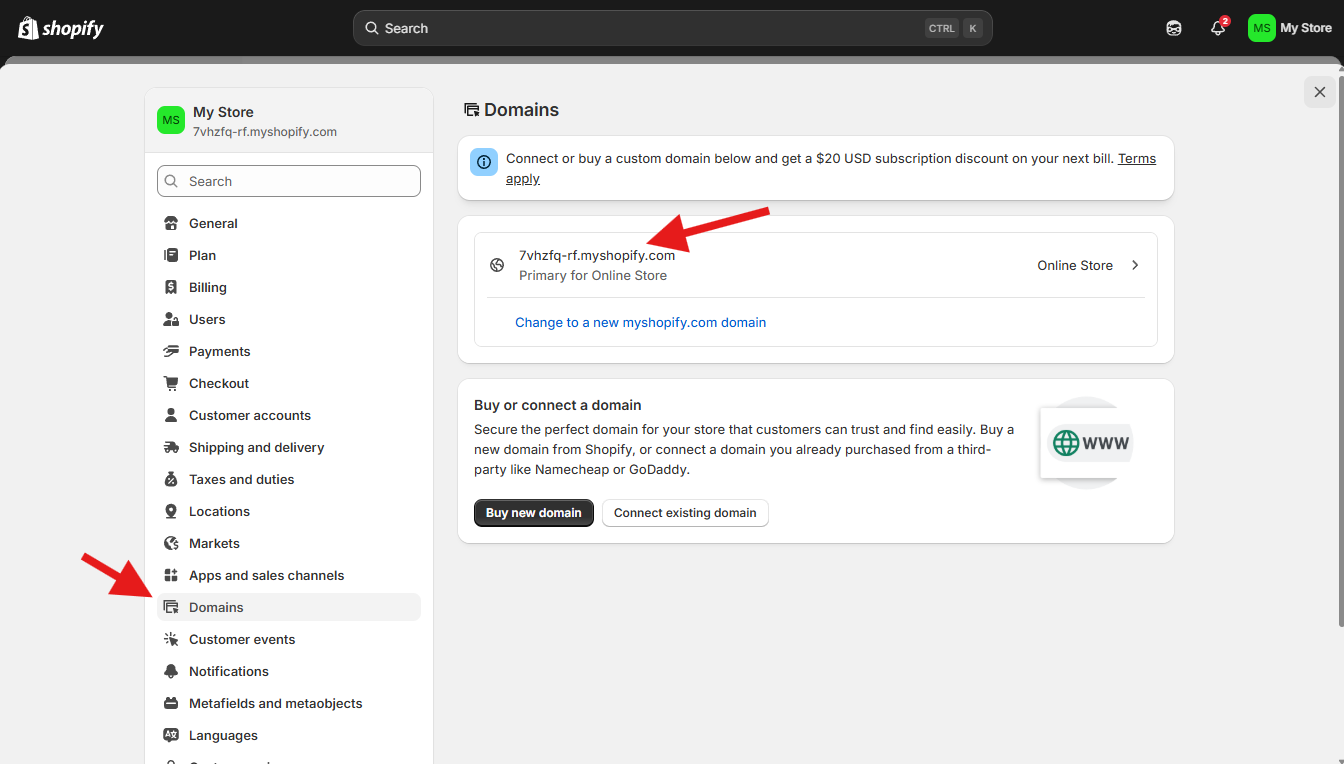
Note: Make sure you only enter the part before “myshopify.com.” In this case, that would be “7vhzfq-rf”.
Now click on “Save.”

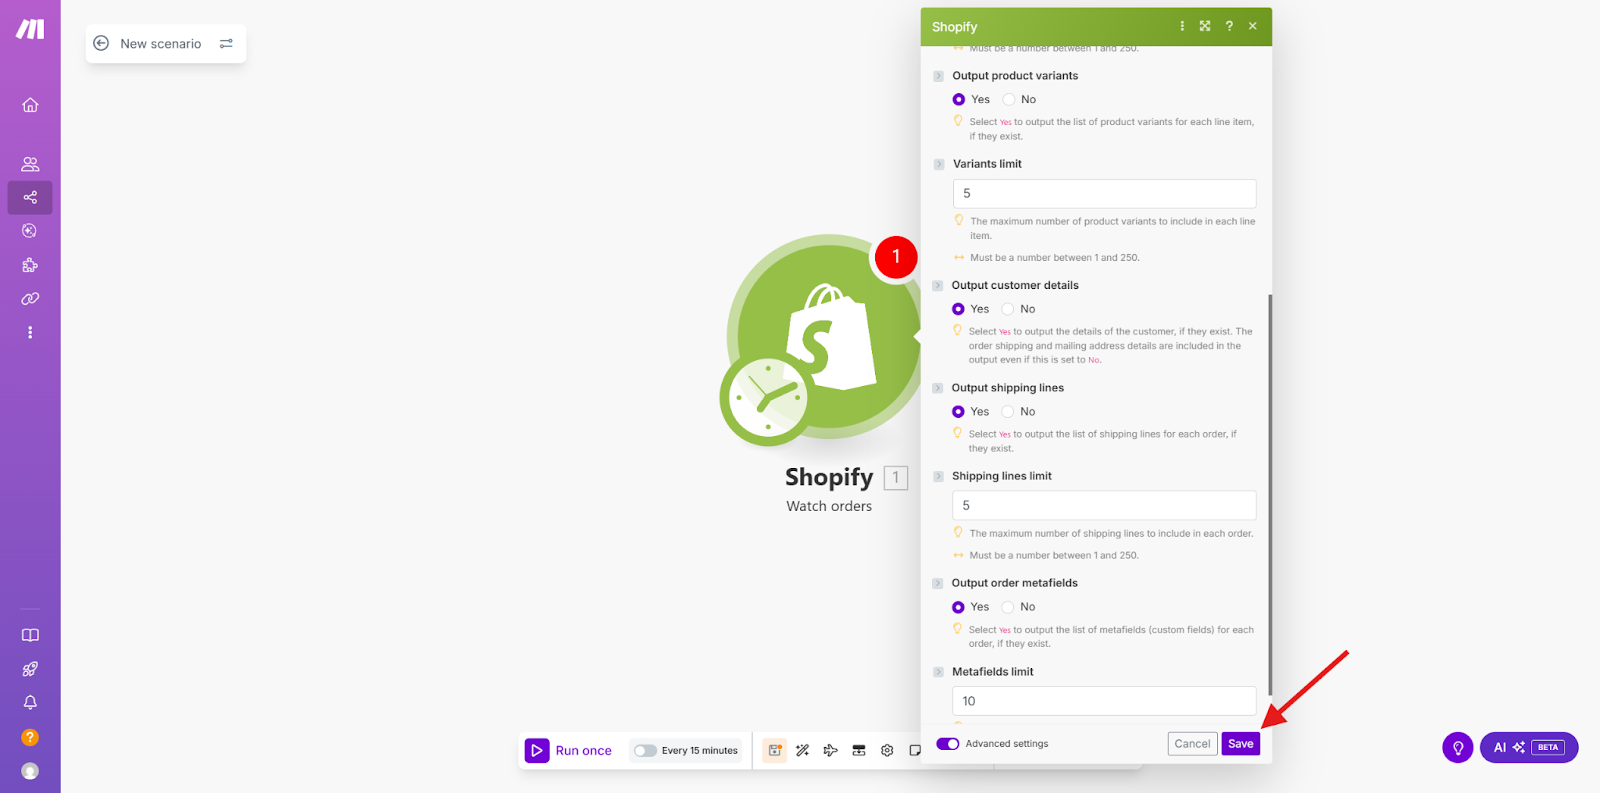
Shopify Module Settings Explained


After you have filled in all the fields, please click on “Save.”
3. Create the Mentortools Course Unlock in the Scenario
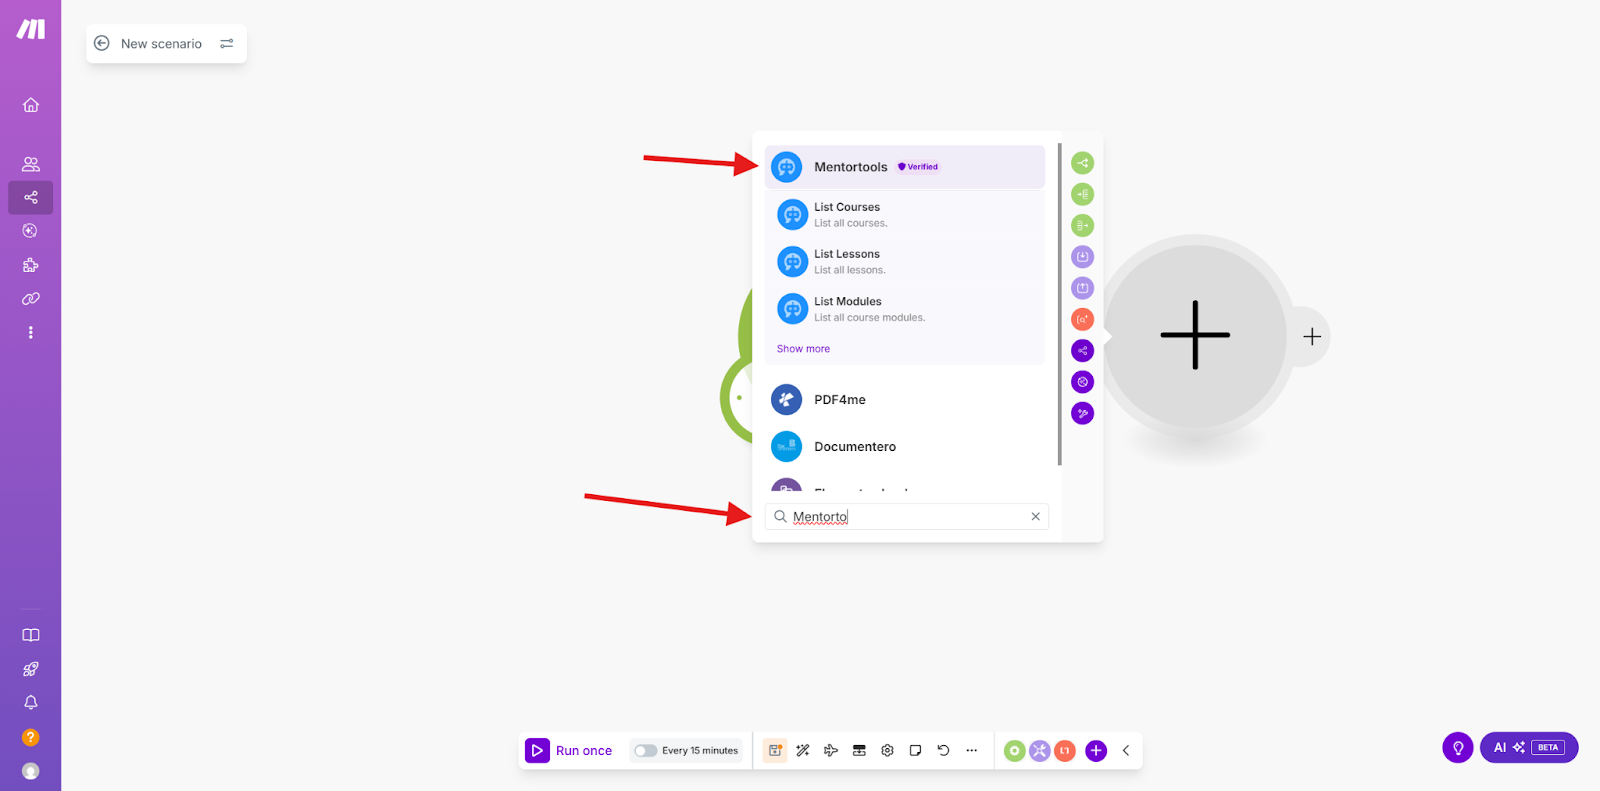
Now select “Mentortools” as the App in the Action step by clicking on the plus sign.
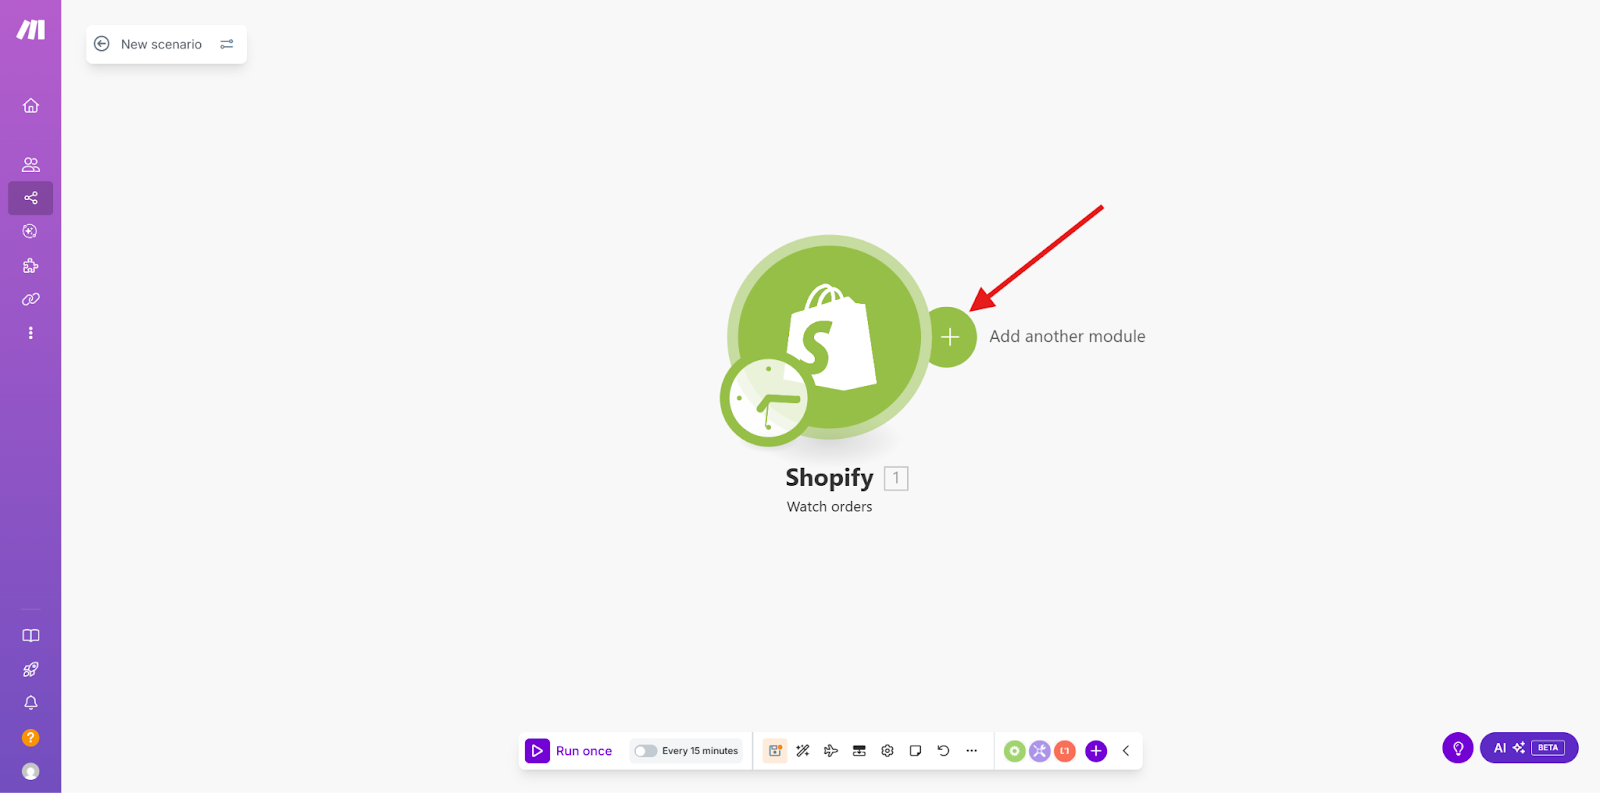
and entering “Mentortools” in the search field.
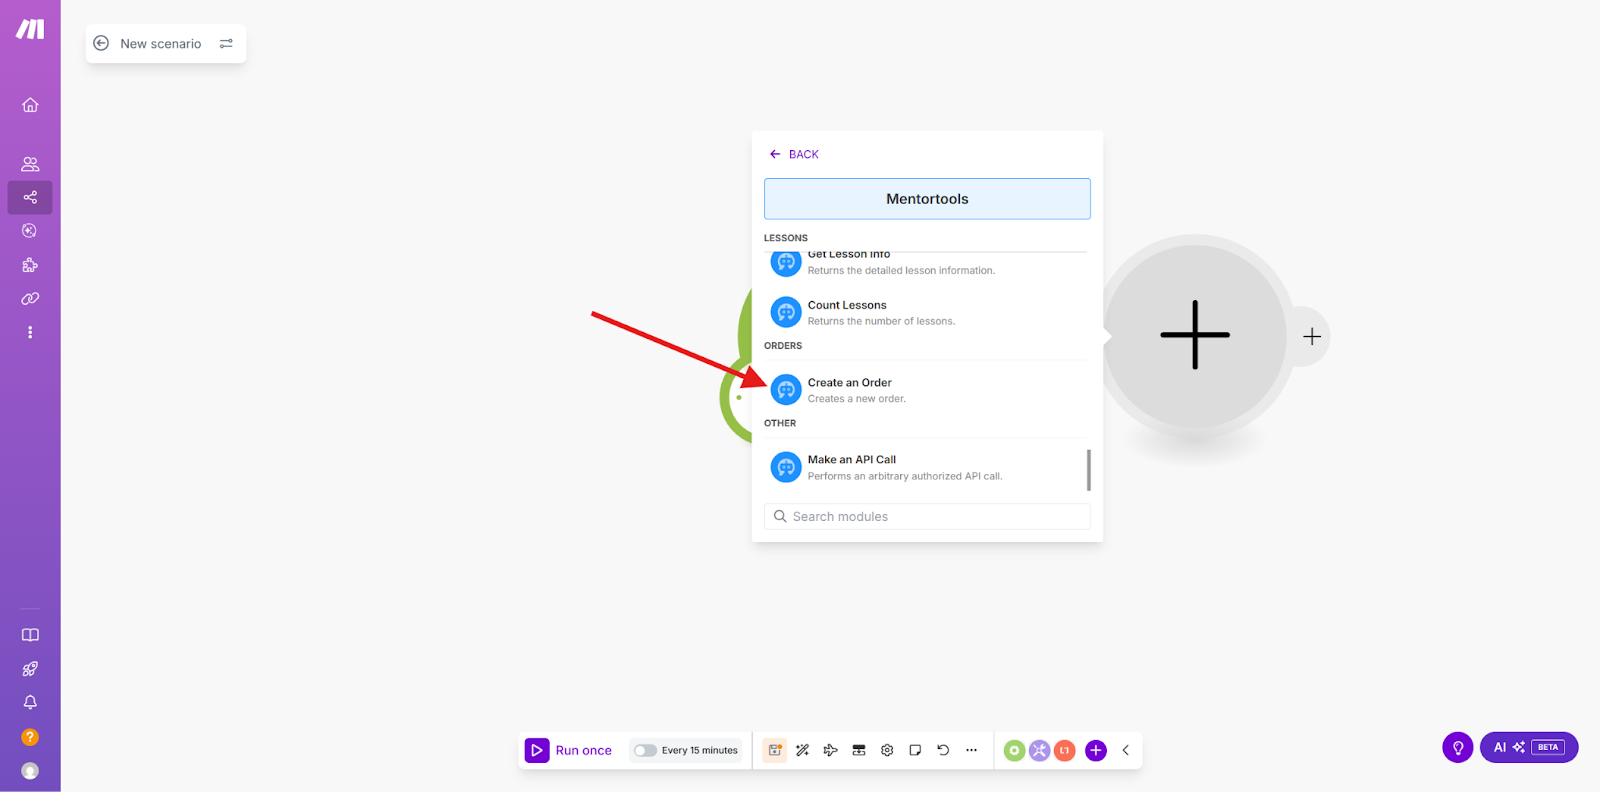
Now choose the action that must be performed in Mentortools after the action in Shopify has triggered the event. In this case, we select “Create an order.”
4. Connect the Data Fields from Shopify with Mentortools
Now the customer data form for course unlocking opens. Here we connect Mentortools with the values from the data in step 1 of the scenario. To do this, click on the input field to open the list of available variables.
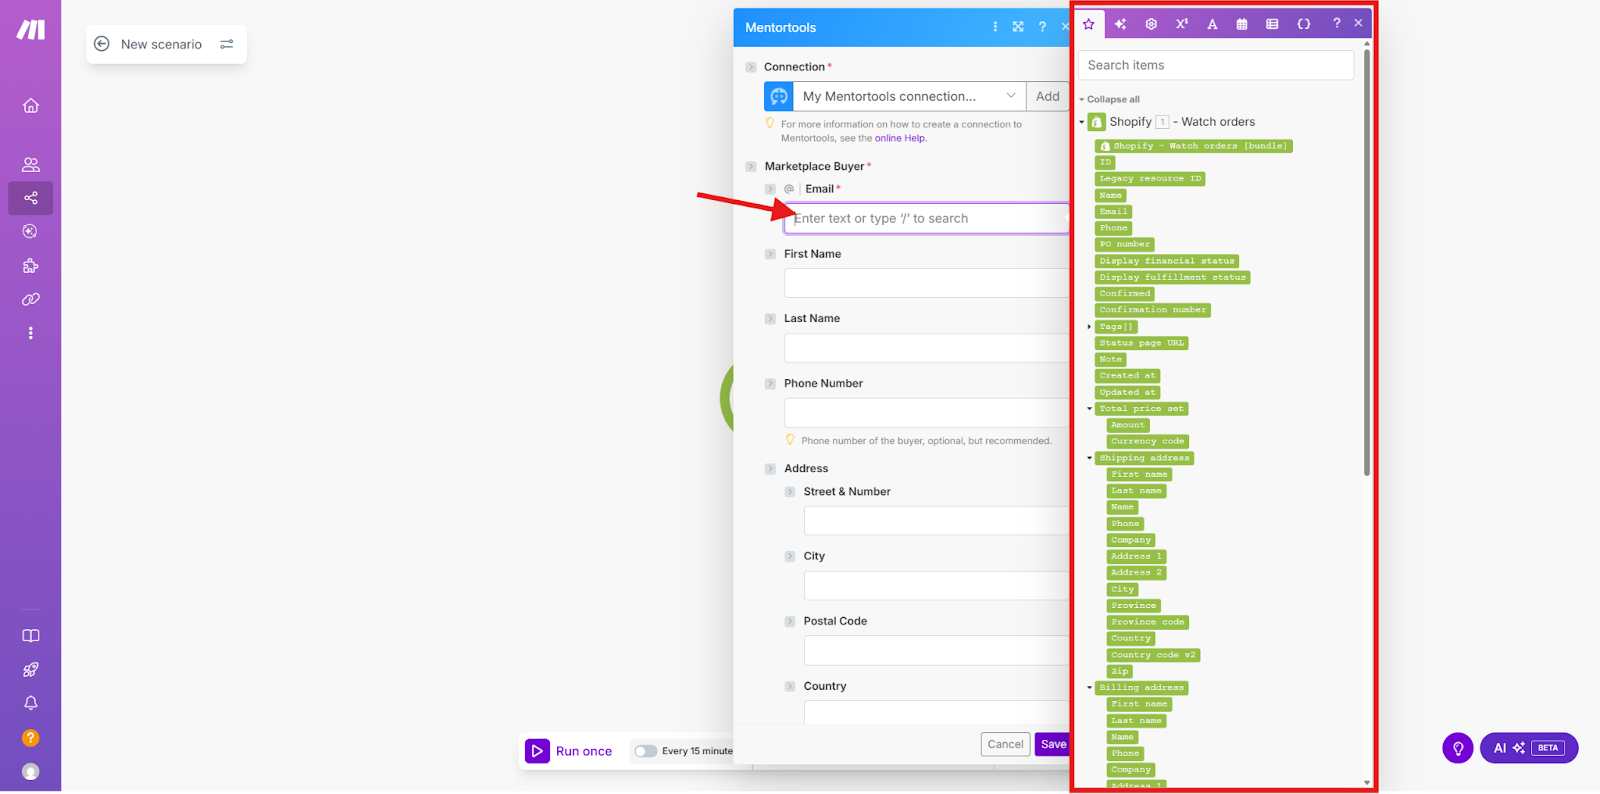
In the list of variables, you will find all the necessary information to fill out the form.
Now choose the variable “Email” for the Email field.

For “First name,” choose the variable “First name,” and so on. When you are done, it should look like this:
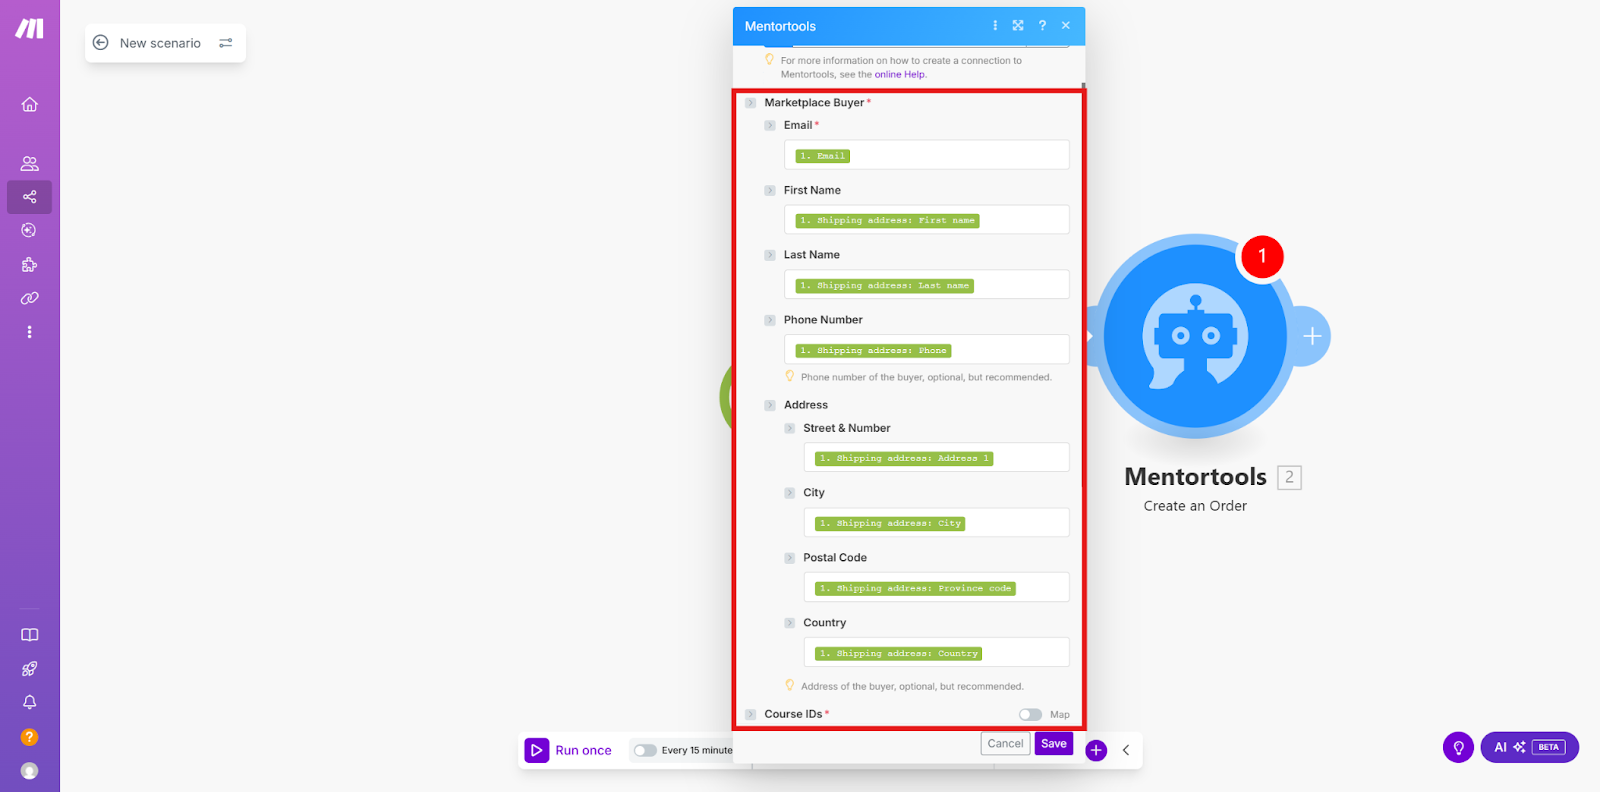
Now scroll down in this form to fill in the remaining fields.
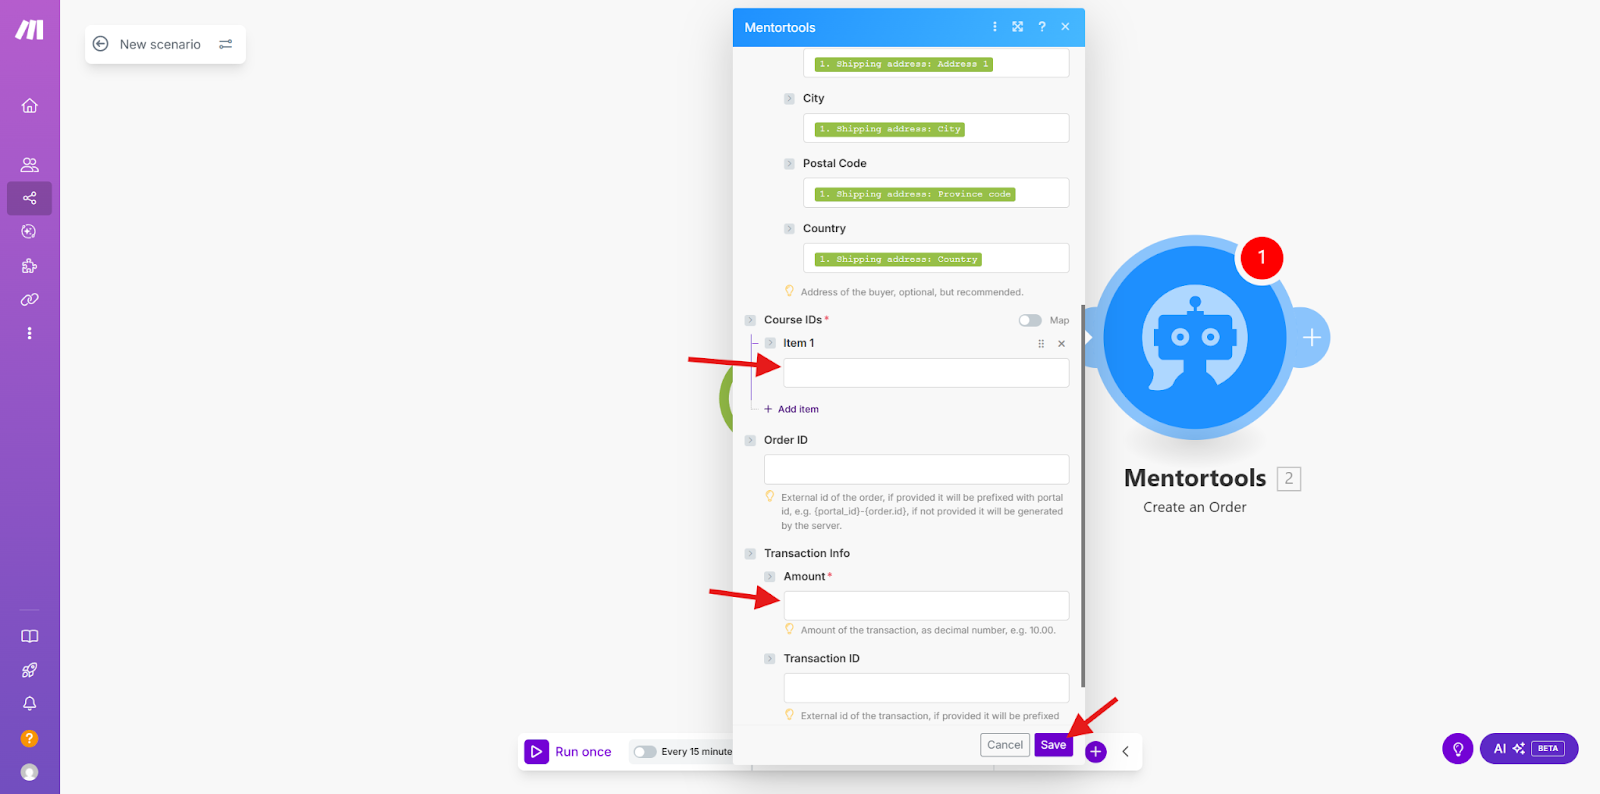
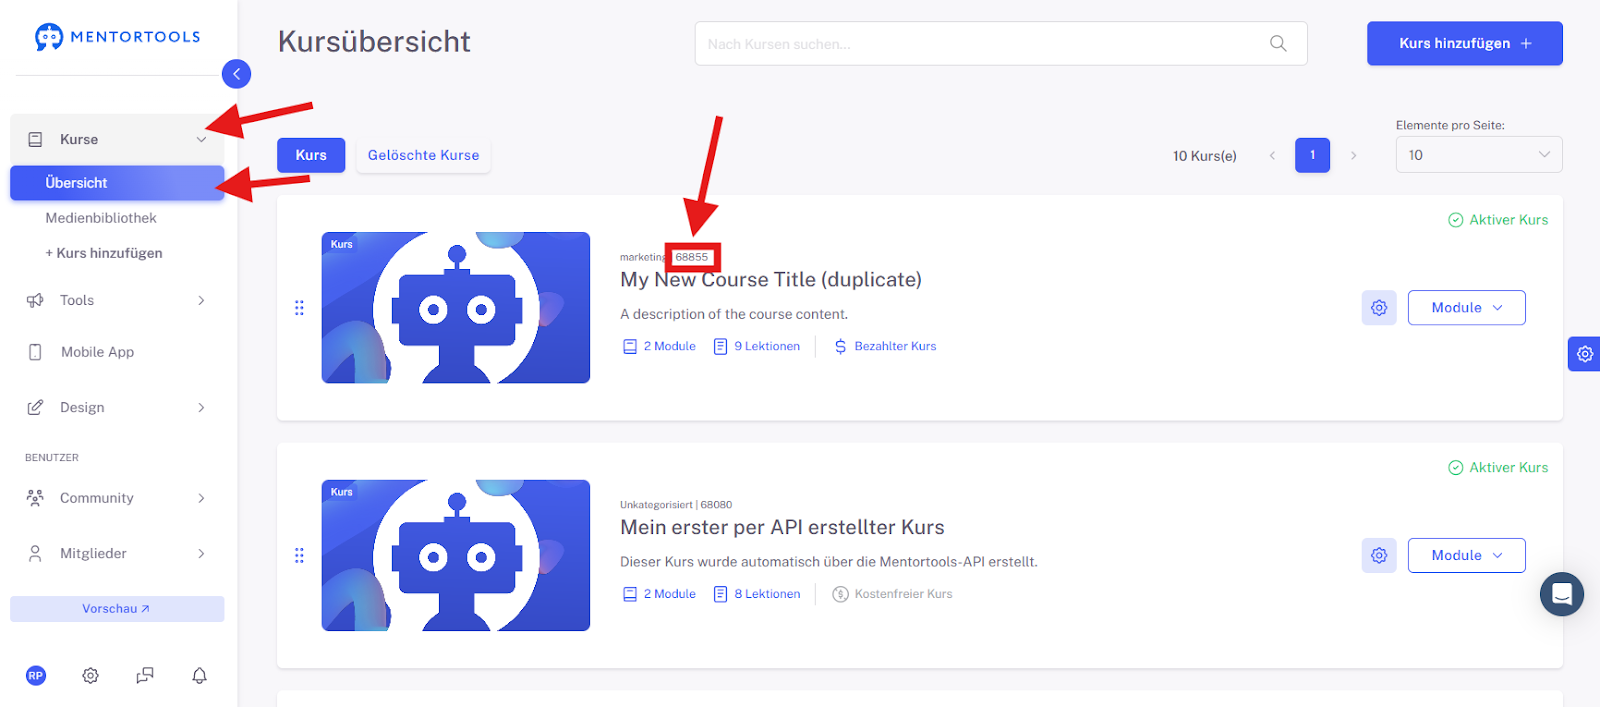
Under Course ID, enter the ID of the course the customer should receive. You can find the course ID here in the Course Overview:
For “Amount,” enter the quantity of courses to be created, in this case “1,” and then click on "Save" to complete the connection. You can then test the connection.
Your Shopify Sale is Now Automated!
Awesome, you did it!
With this guide, you have successfully built a real bridge between your Shopify store and Mentortools using Make. You've learned how important the correct Shopify Subdomain and the Module Settings are so that all customer data (email, name, etc.) arrives cleanly.
The best part: As soon as you activate your scenario, the course unlock runs fully automatically.
Every purchase in your Shopify store immediately triggers the creation of an order and the unlock of the correct course in Mentortools. This saves you a ton of manual work and gives your customers the best possible buying experience with instant access.