Messaging and Chat Groups – Introduction and Core Functions
We developed the messaging function to make communication between you and your course participants in Mentortools more direct and centralized. By offering immediate, chat-based interaction, this feature supports your engagement and effective course management.
Last updated 9 months ago
This tool was designed for four central use cases to optimize your workflows and customer relationship management:
Replacement for Group Platforms (e.g., WhatsApp)
The function allows for faster and more direct exchange than traditional community forums. You can create Read-Only groups to keep all course participants up-to-date, distribute important updates, or centralize the submission of questions.
Dedicated Support Channel
Use the chat to handle direct support inquiries and offer your students an efficient, personal line of communication.
Automated Onboarding Communication
The system can be set up to automatically send personalized messages to users who have purchased a course—for example, congratulations and recommendations for the first steps. Subsequent support inquiries can then be handled manually within the chat interface.
Advanced Automations and Integrations
Link the chat function with external tools like Make (formerly Integromat) to trigger messages based on user actions, such as completing a specific lesson. This enables tailored, automated communication workflows, for instance, sending weekly motivational messages.
How do I set up messaging?
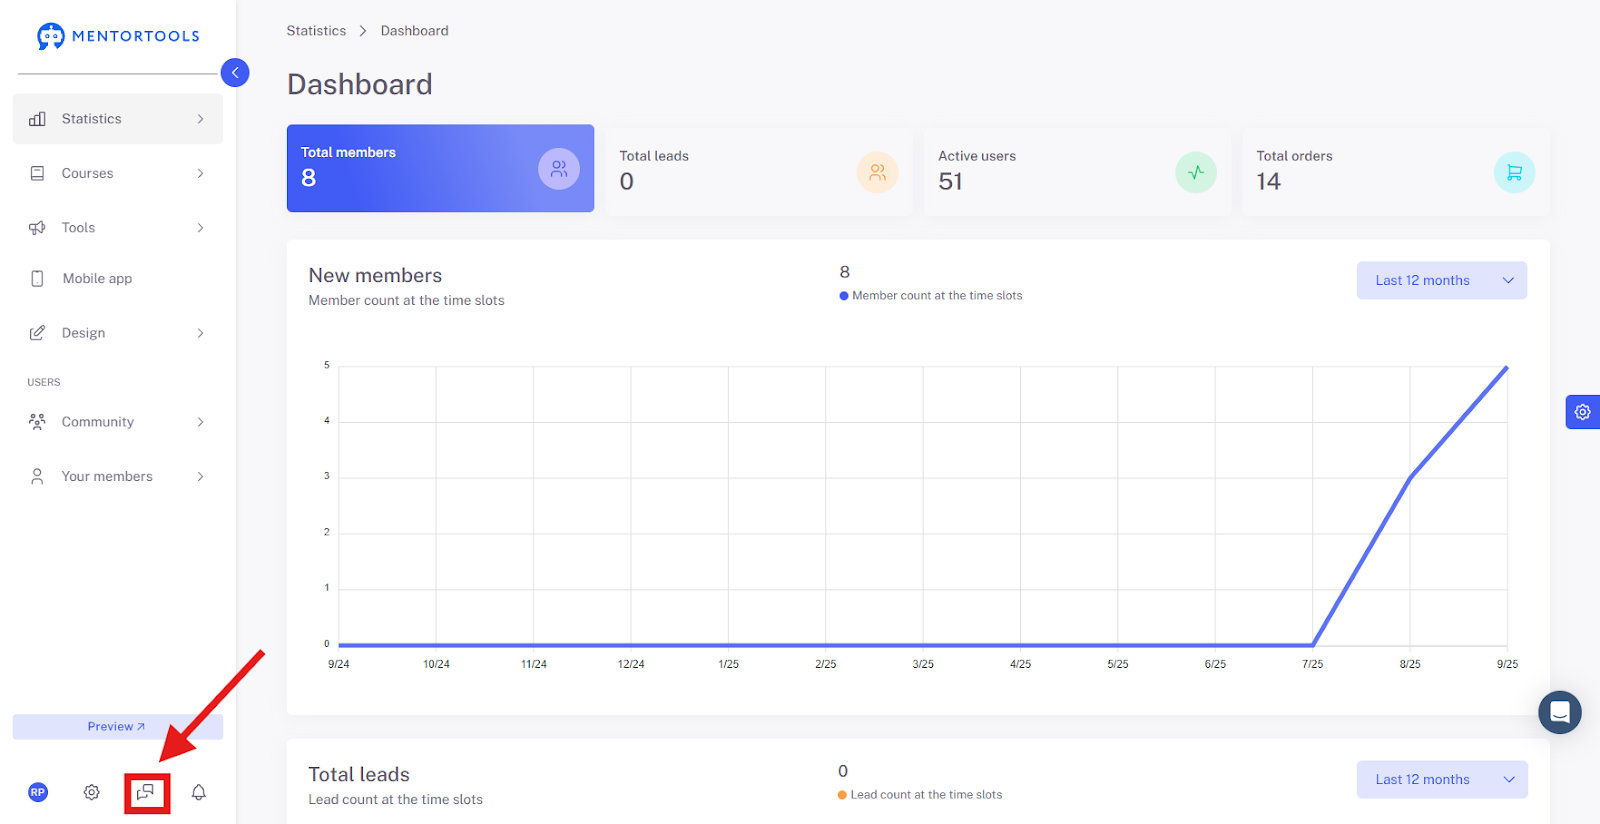
Click the Messages icon on the bottom left to begin the setup.
Now click on “Set up messaging”
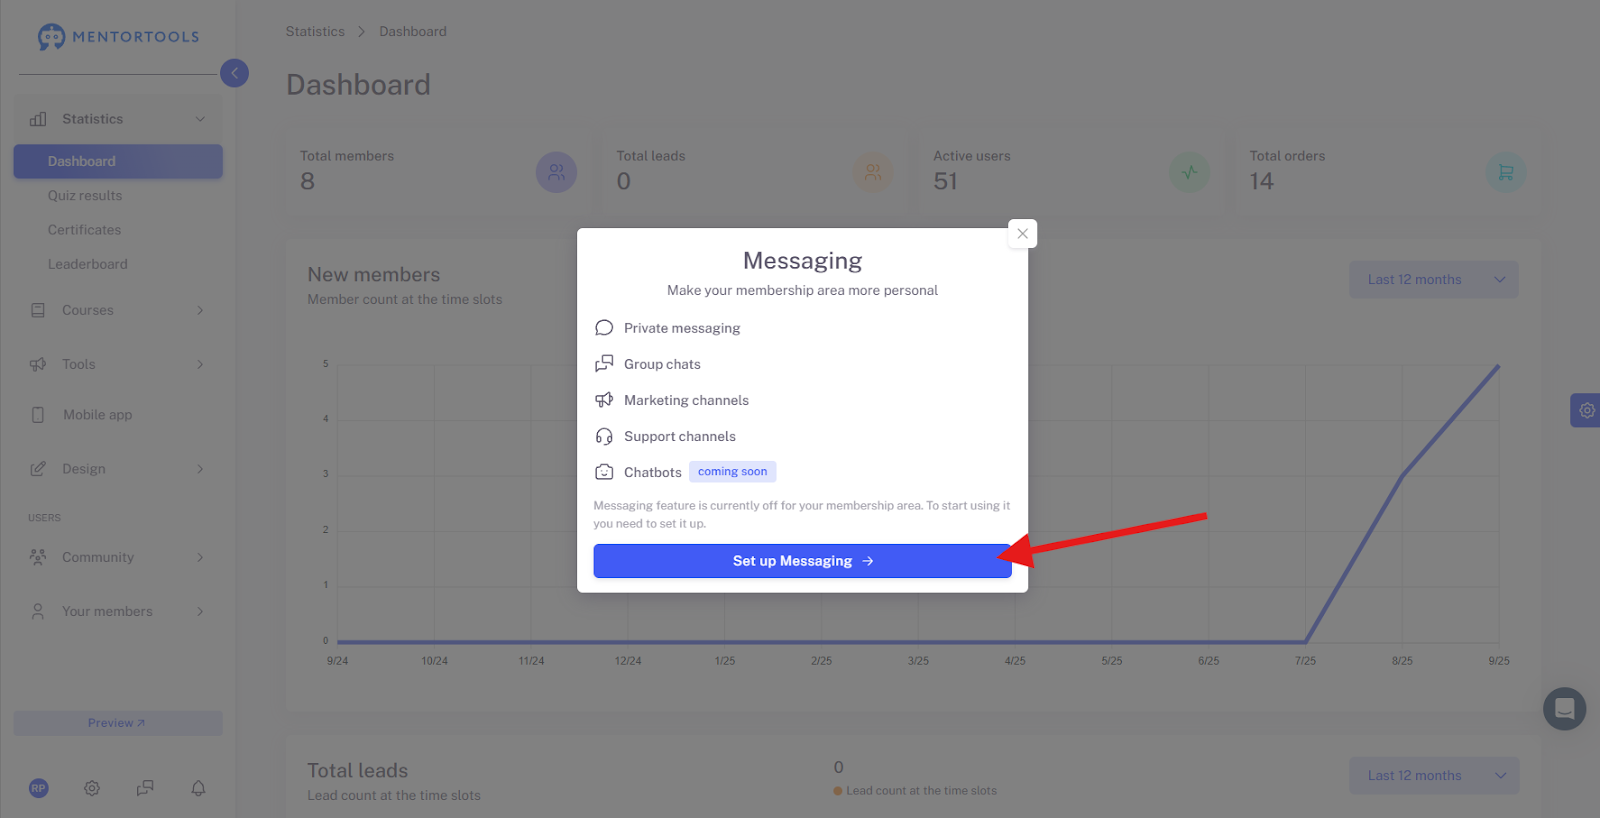
This area serves to activate the messaging function for your platform and define basic permissions.
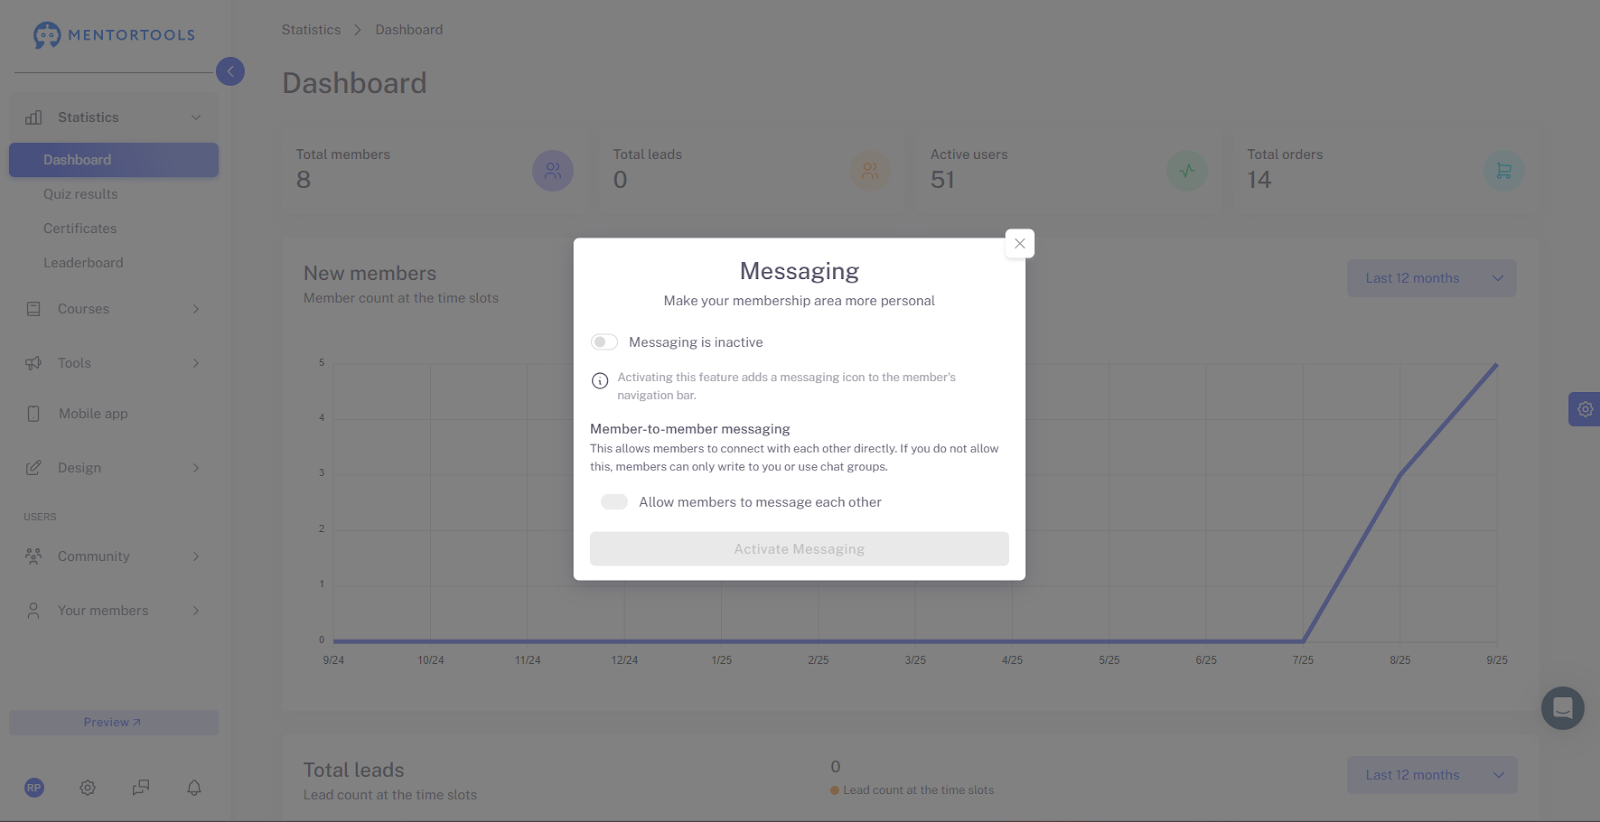
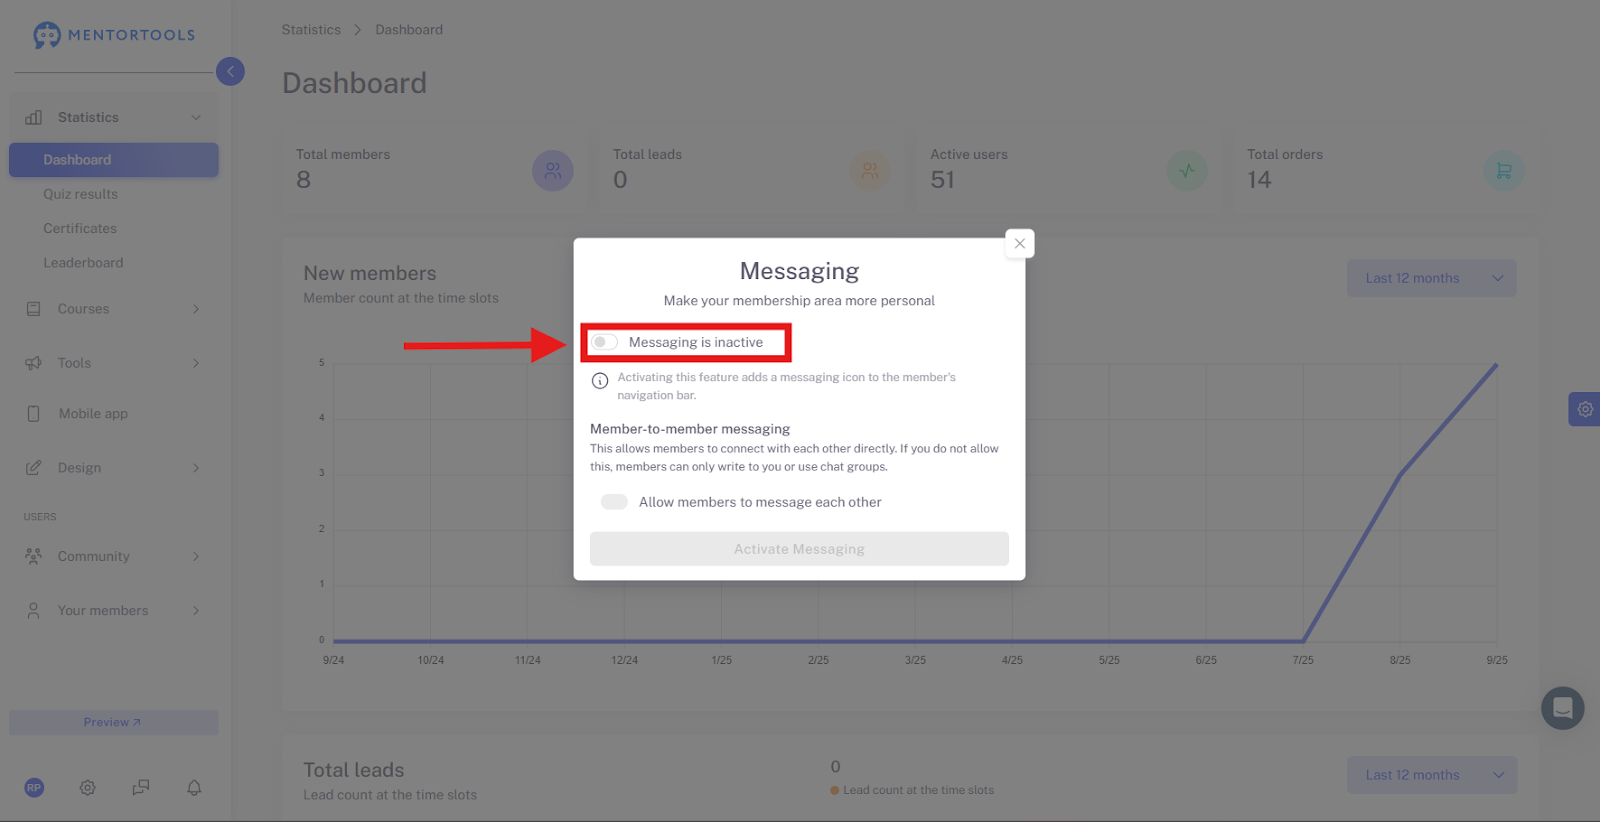
How do I activate messaging?
Function:
This is the central switch to turn the entire messaging function on or off.
Important: If you activate this option, the Messages button is automatically added to your members’ navigation bar. Your course participants will see this button as soon as the function is active and can then access the chat functionalities.
What is Member-to-Member Messaging?
What is it? This option regulates whether your members are allowed to chat directly with each other (Peer-to-Peer communication).
Allow Member-to-Member Messages:
Activated: Members can send private messages to each other. This promotes networking but may lead to increased moderation effort in some communities.
Deactivated (Recommended if you want to maintain control): Members can only write directly to you or participate in chat groups you create. They cannot start private conversations with other students.
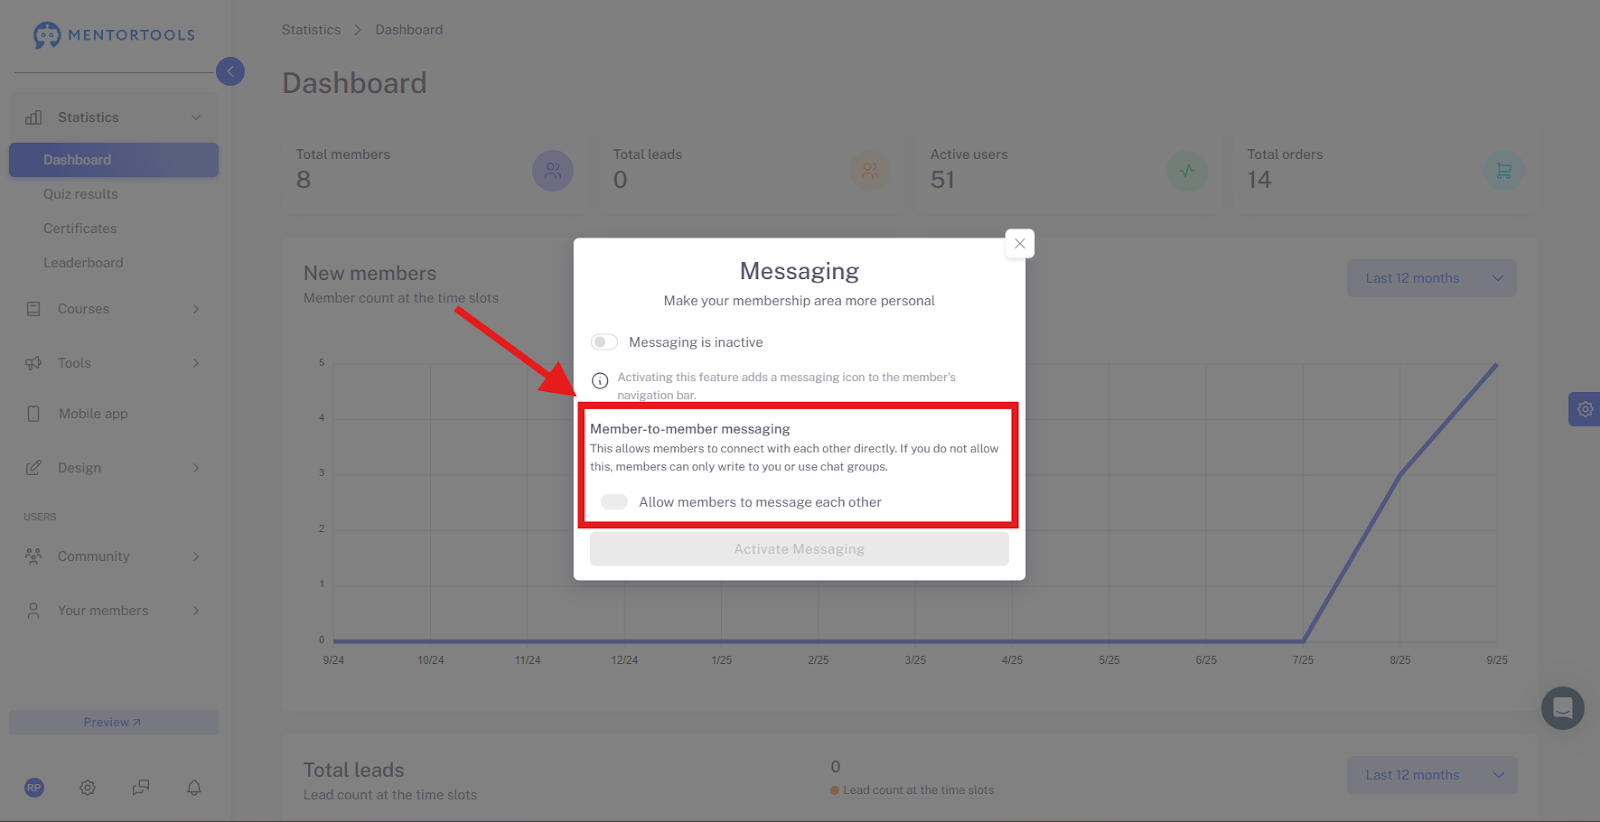
Activate Messaging
Save: After selecting your preferences (whether the messaging function in general and whether the member-to-member function should be activated), you must finally click this button. Only then will your settings be saved and take effect.

Messages Overview – Structure and Elements
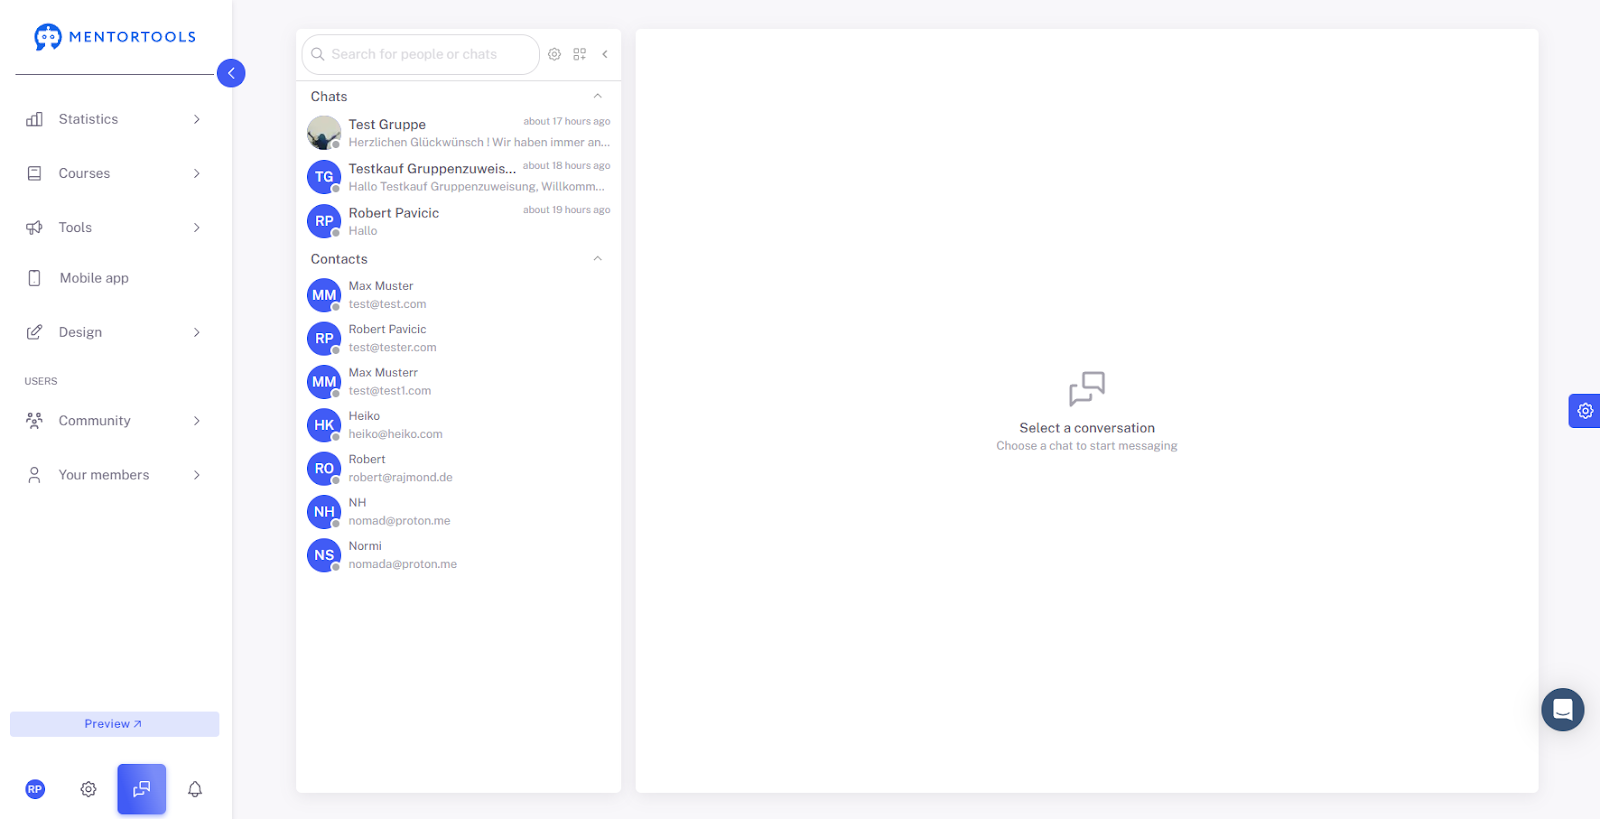
The messaging interface is divided into two main areas: the Navigation Bar on the left and the Chat Area on the right.
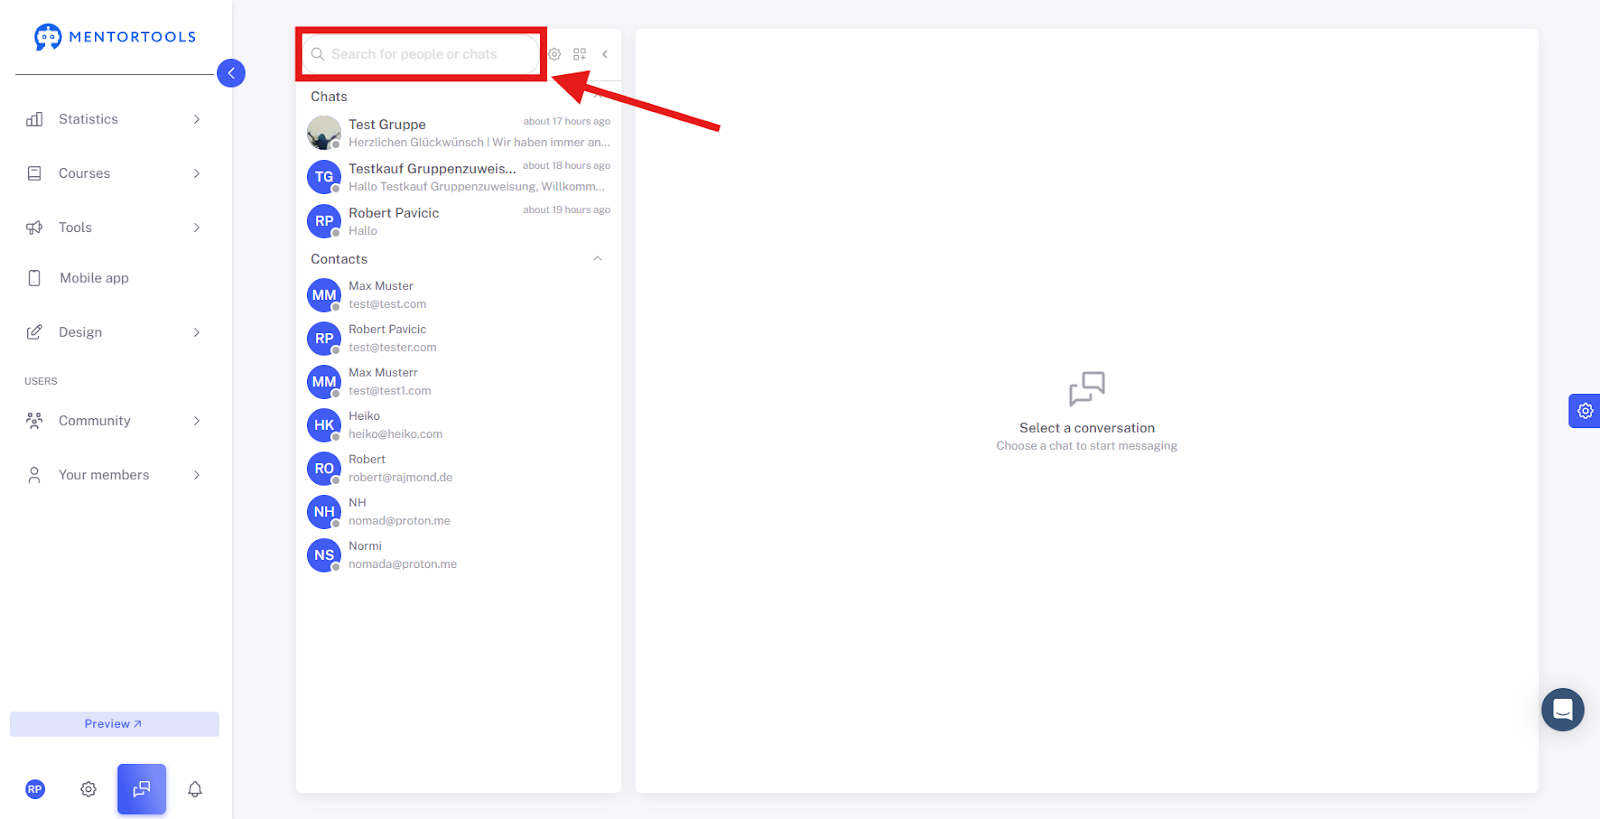
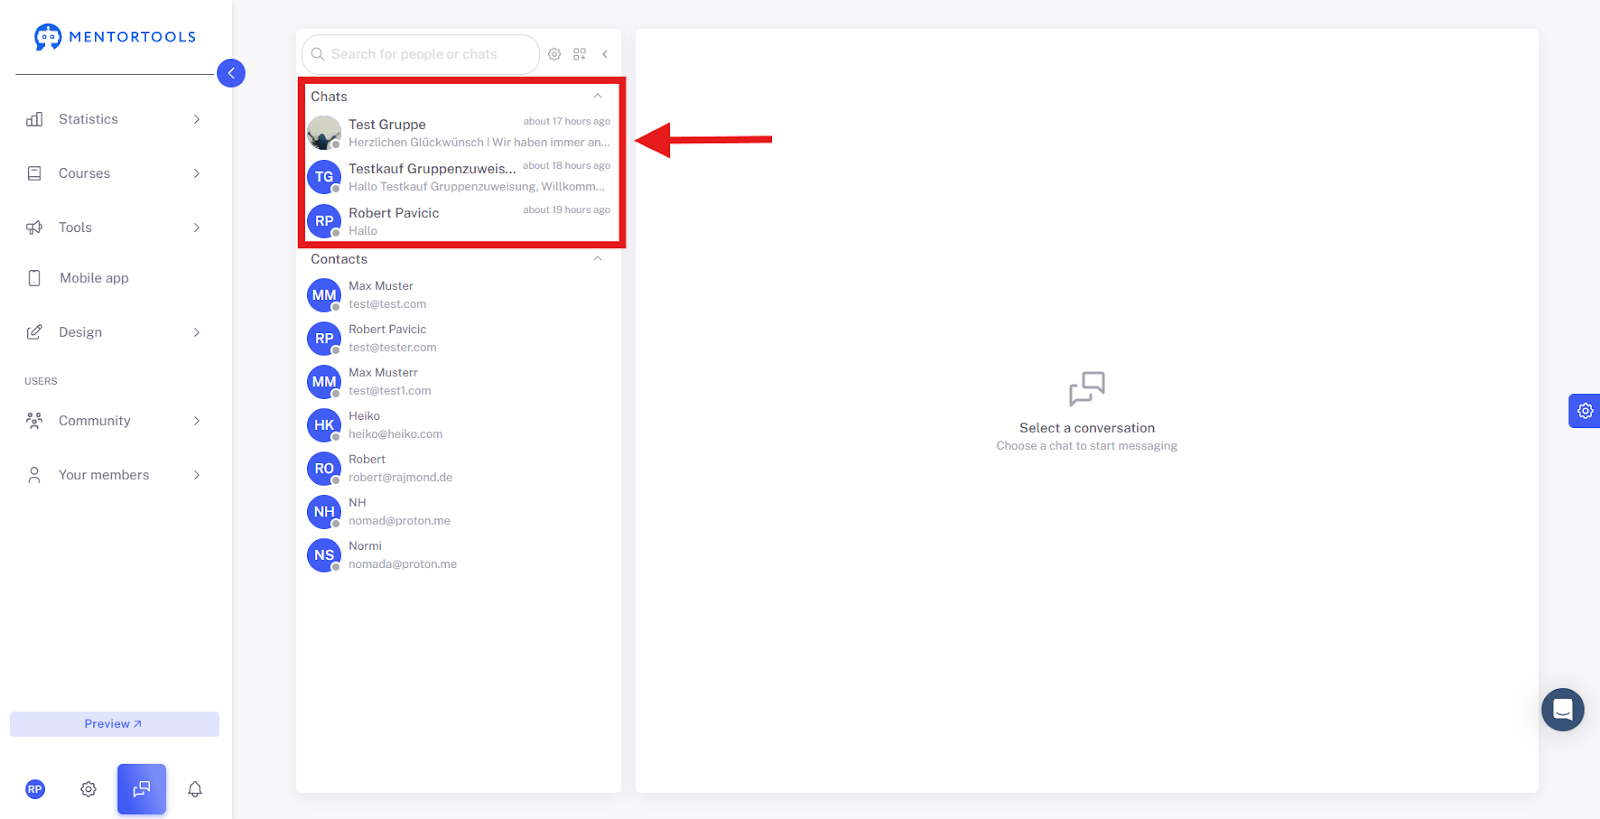
Left Navigation Bar (Overview)
This area serves as your central inbox and address book.
Searchbar(Search for people or chats): Use this field to quickly search for specific members or existing chats.
Chats: All your current conversations are displayed here, whether with individual members or in chat groups.
Contacts: This is your address book. Here you see all members of your platform with whom you could theoretically start a conversation.

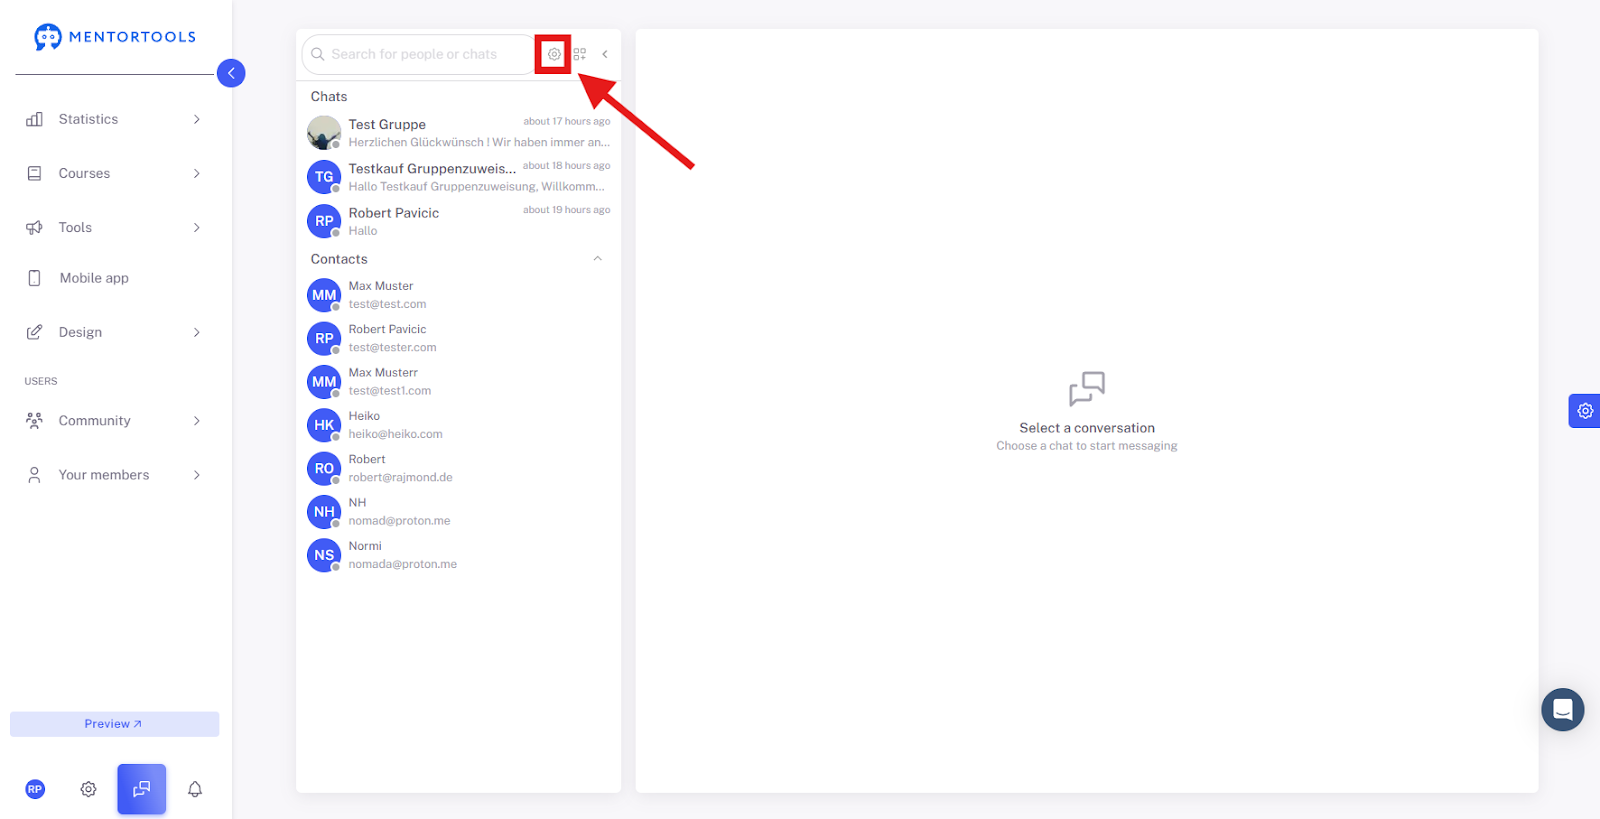
Settings: Here you can change the basic settings at any time.

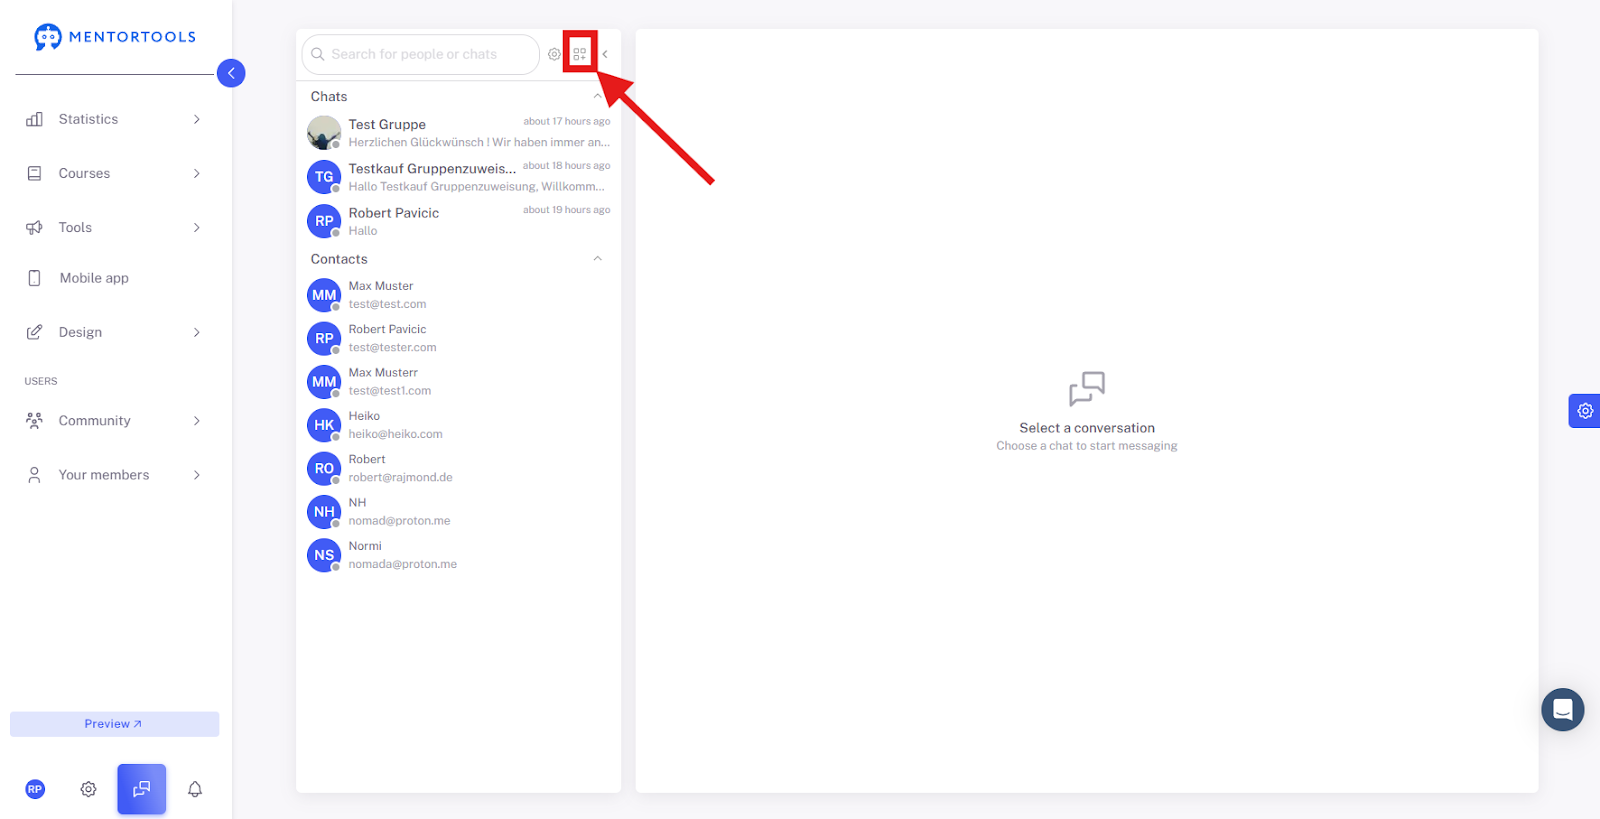
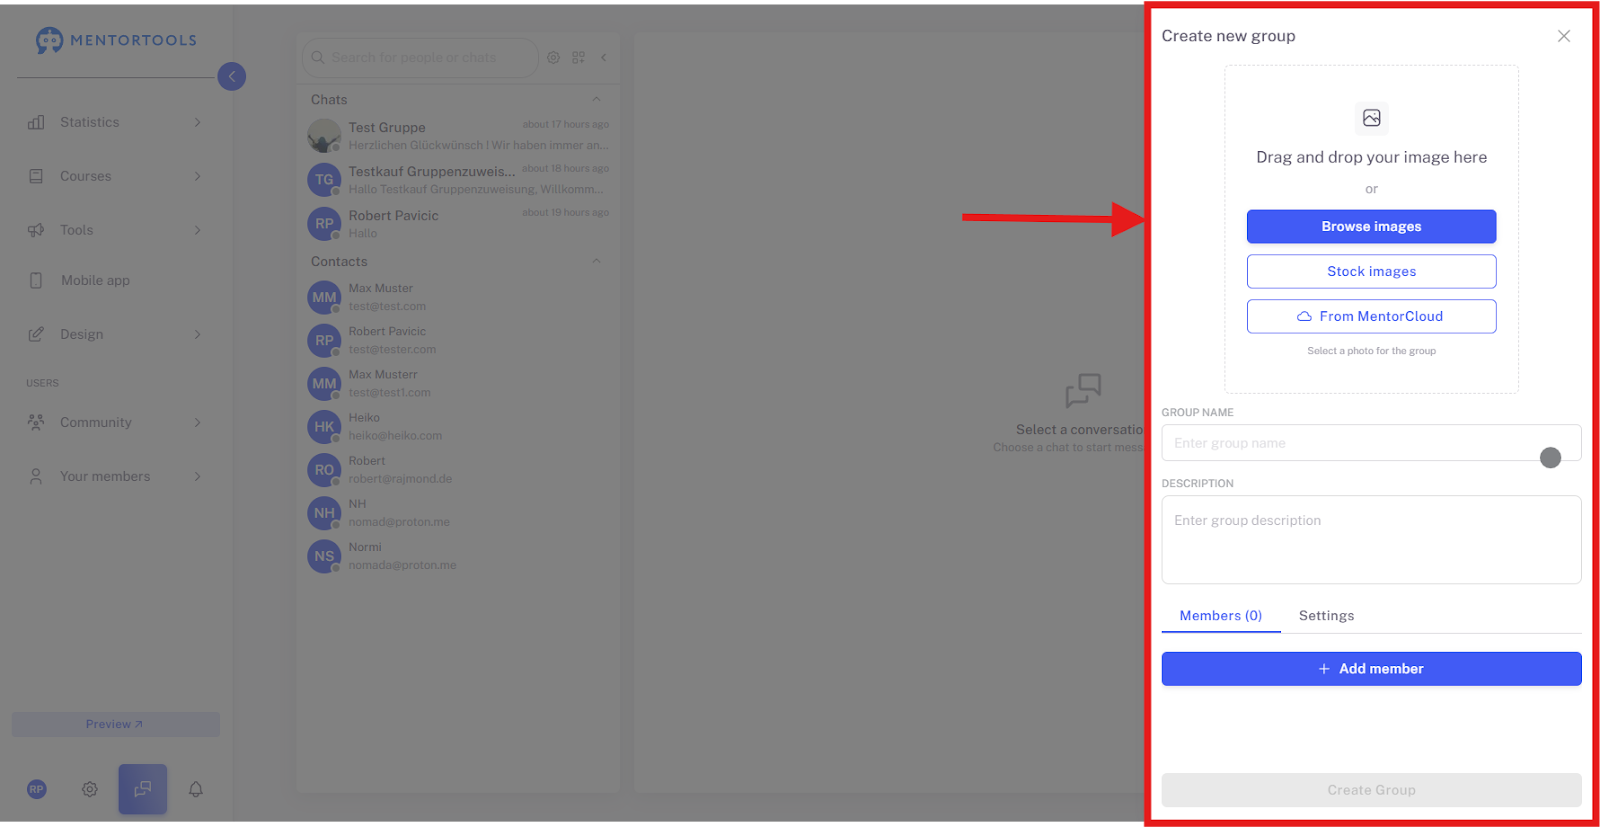
Create New Group: Clicking this button opens the window with all the setting options for creating a group.
Right Chat Area (Conversation)
This is the active area where communication takes place.
Header (e.g., "Test Gruppe"): This displays the name of the member or group you are currently chatting with, if one is selected.
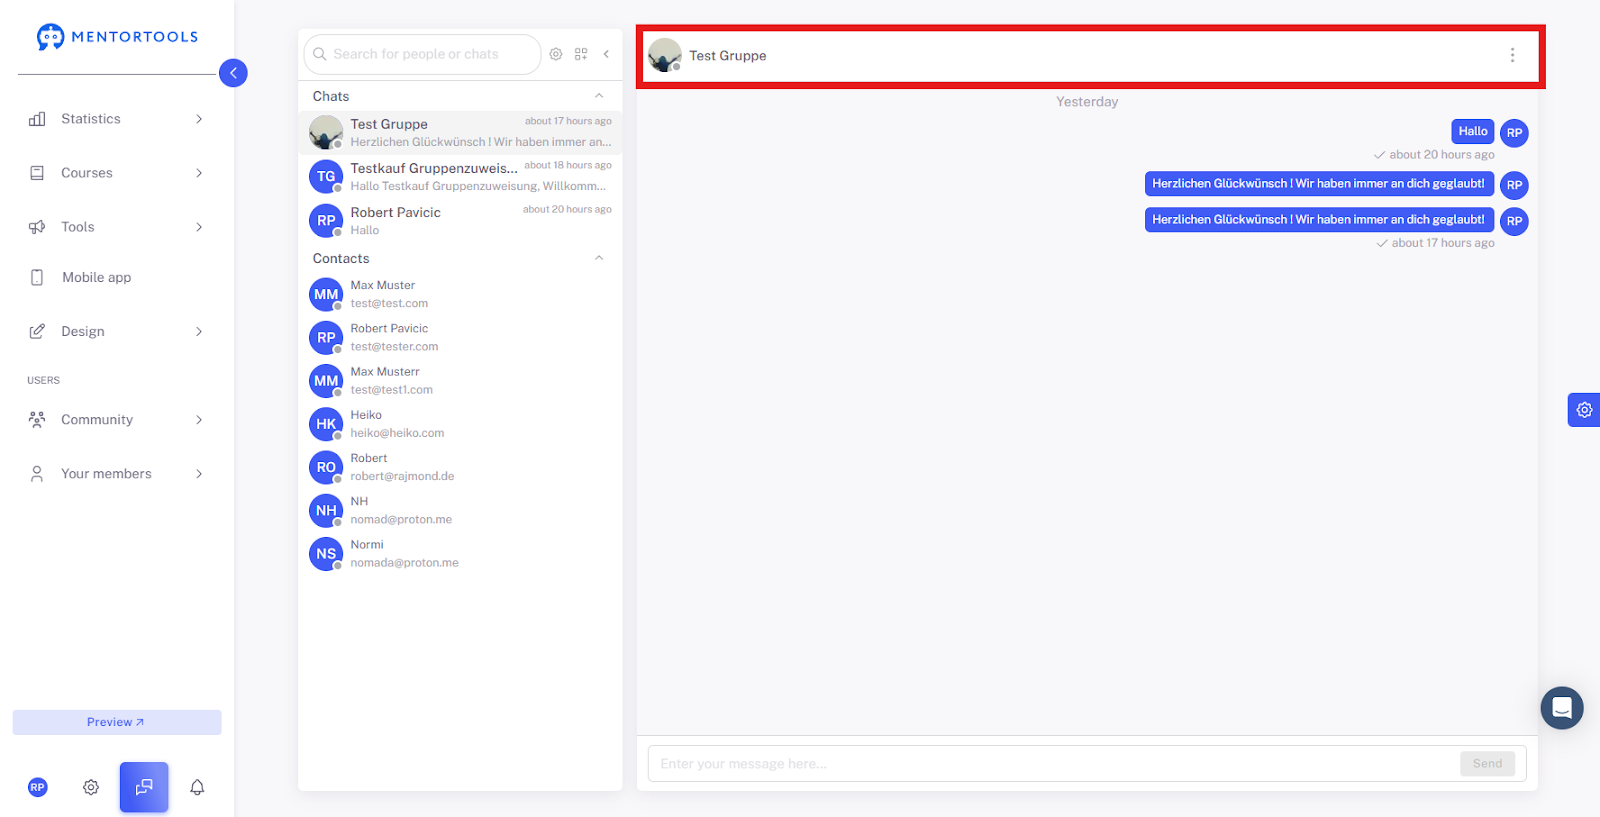
Chat Window: In the middle, you see the history of the current conversation.
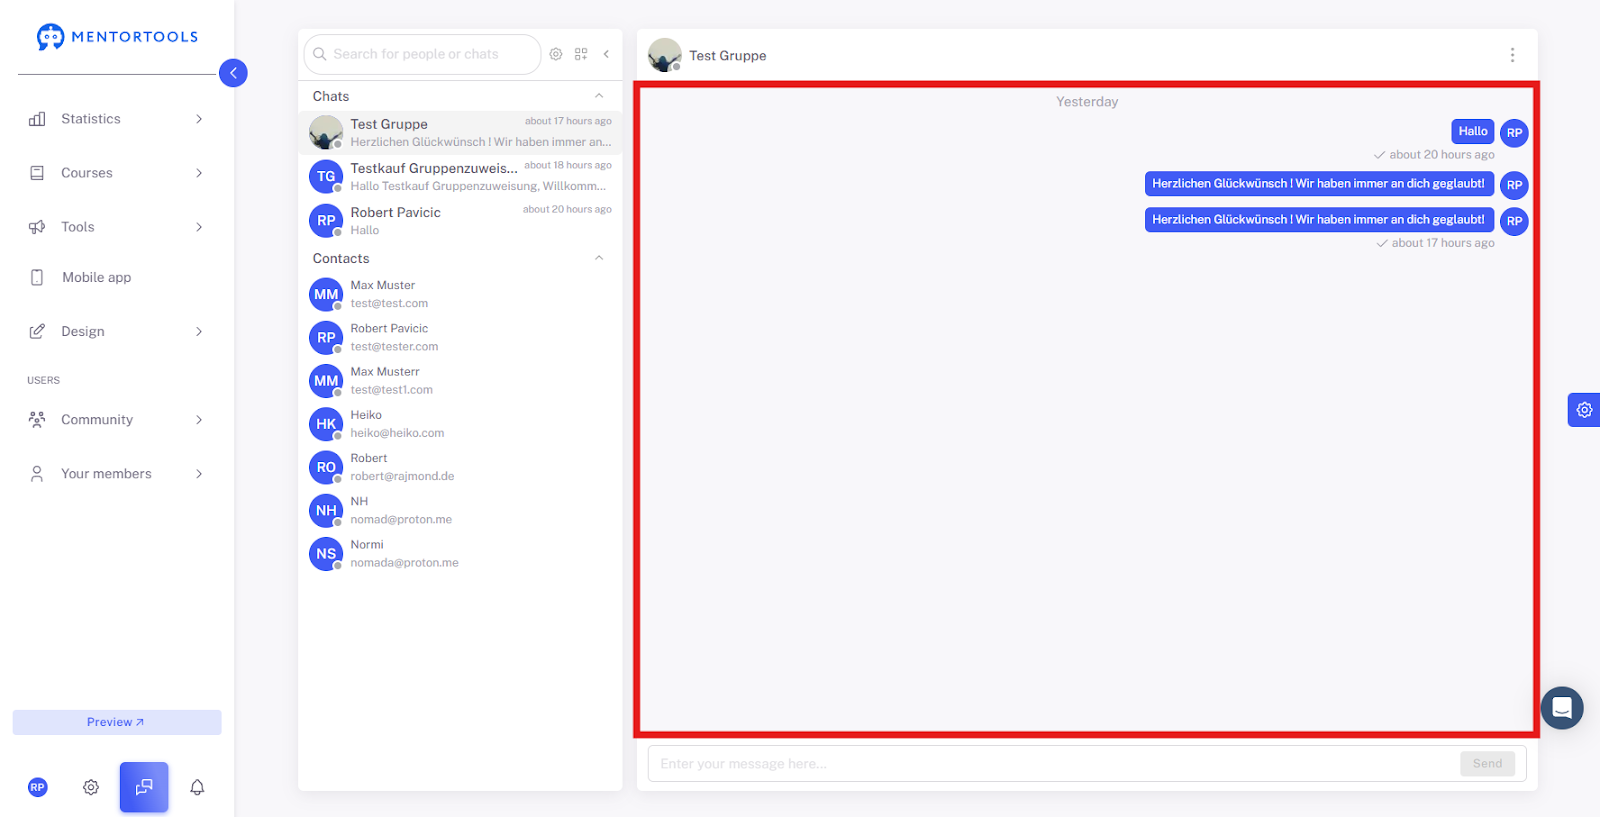
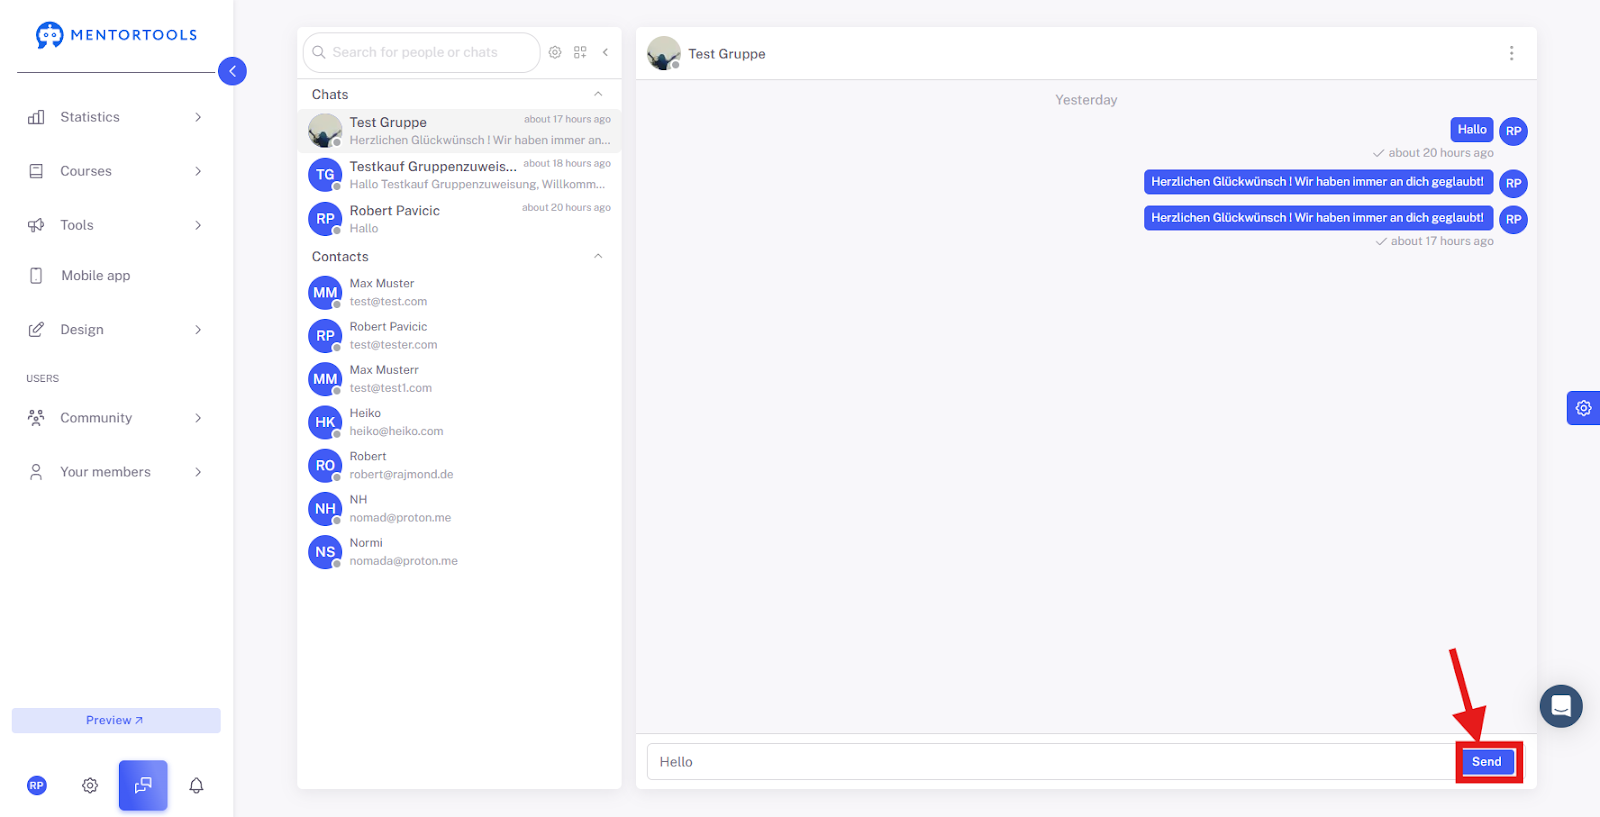
Message field( "Enter your message..."): This is where you write your message.

Send Button: Click here to send your entered message.
Three Dots: Clicking the 3 dots in the header allows you to copy the link to this chat, view the group information (if it is a chat group), and delete the chat.

Overall, the interface is structured so that you have a quick overview of all your contacts and chats and can fully concentrate on the conversation.
These functions give you full control over communication and allow you to effectively manage engagement in your community.